Action sports camera system
WMP product design studio
A small product design studio called WMP creative had been creating a new action camera and all its accessories for a client promising to be more aerodynamic and better designed in the hope of taking some of the GoPro market.
My role

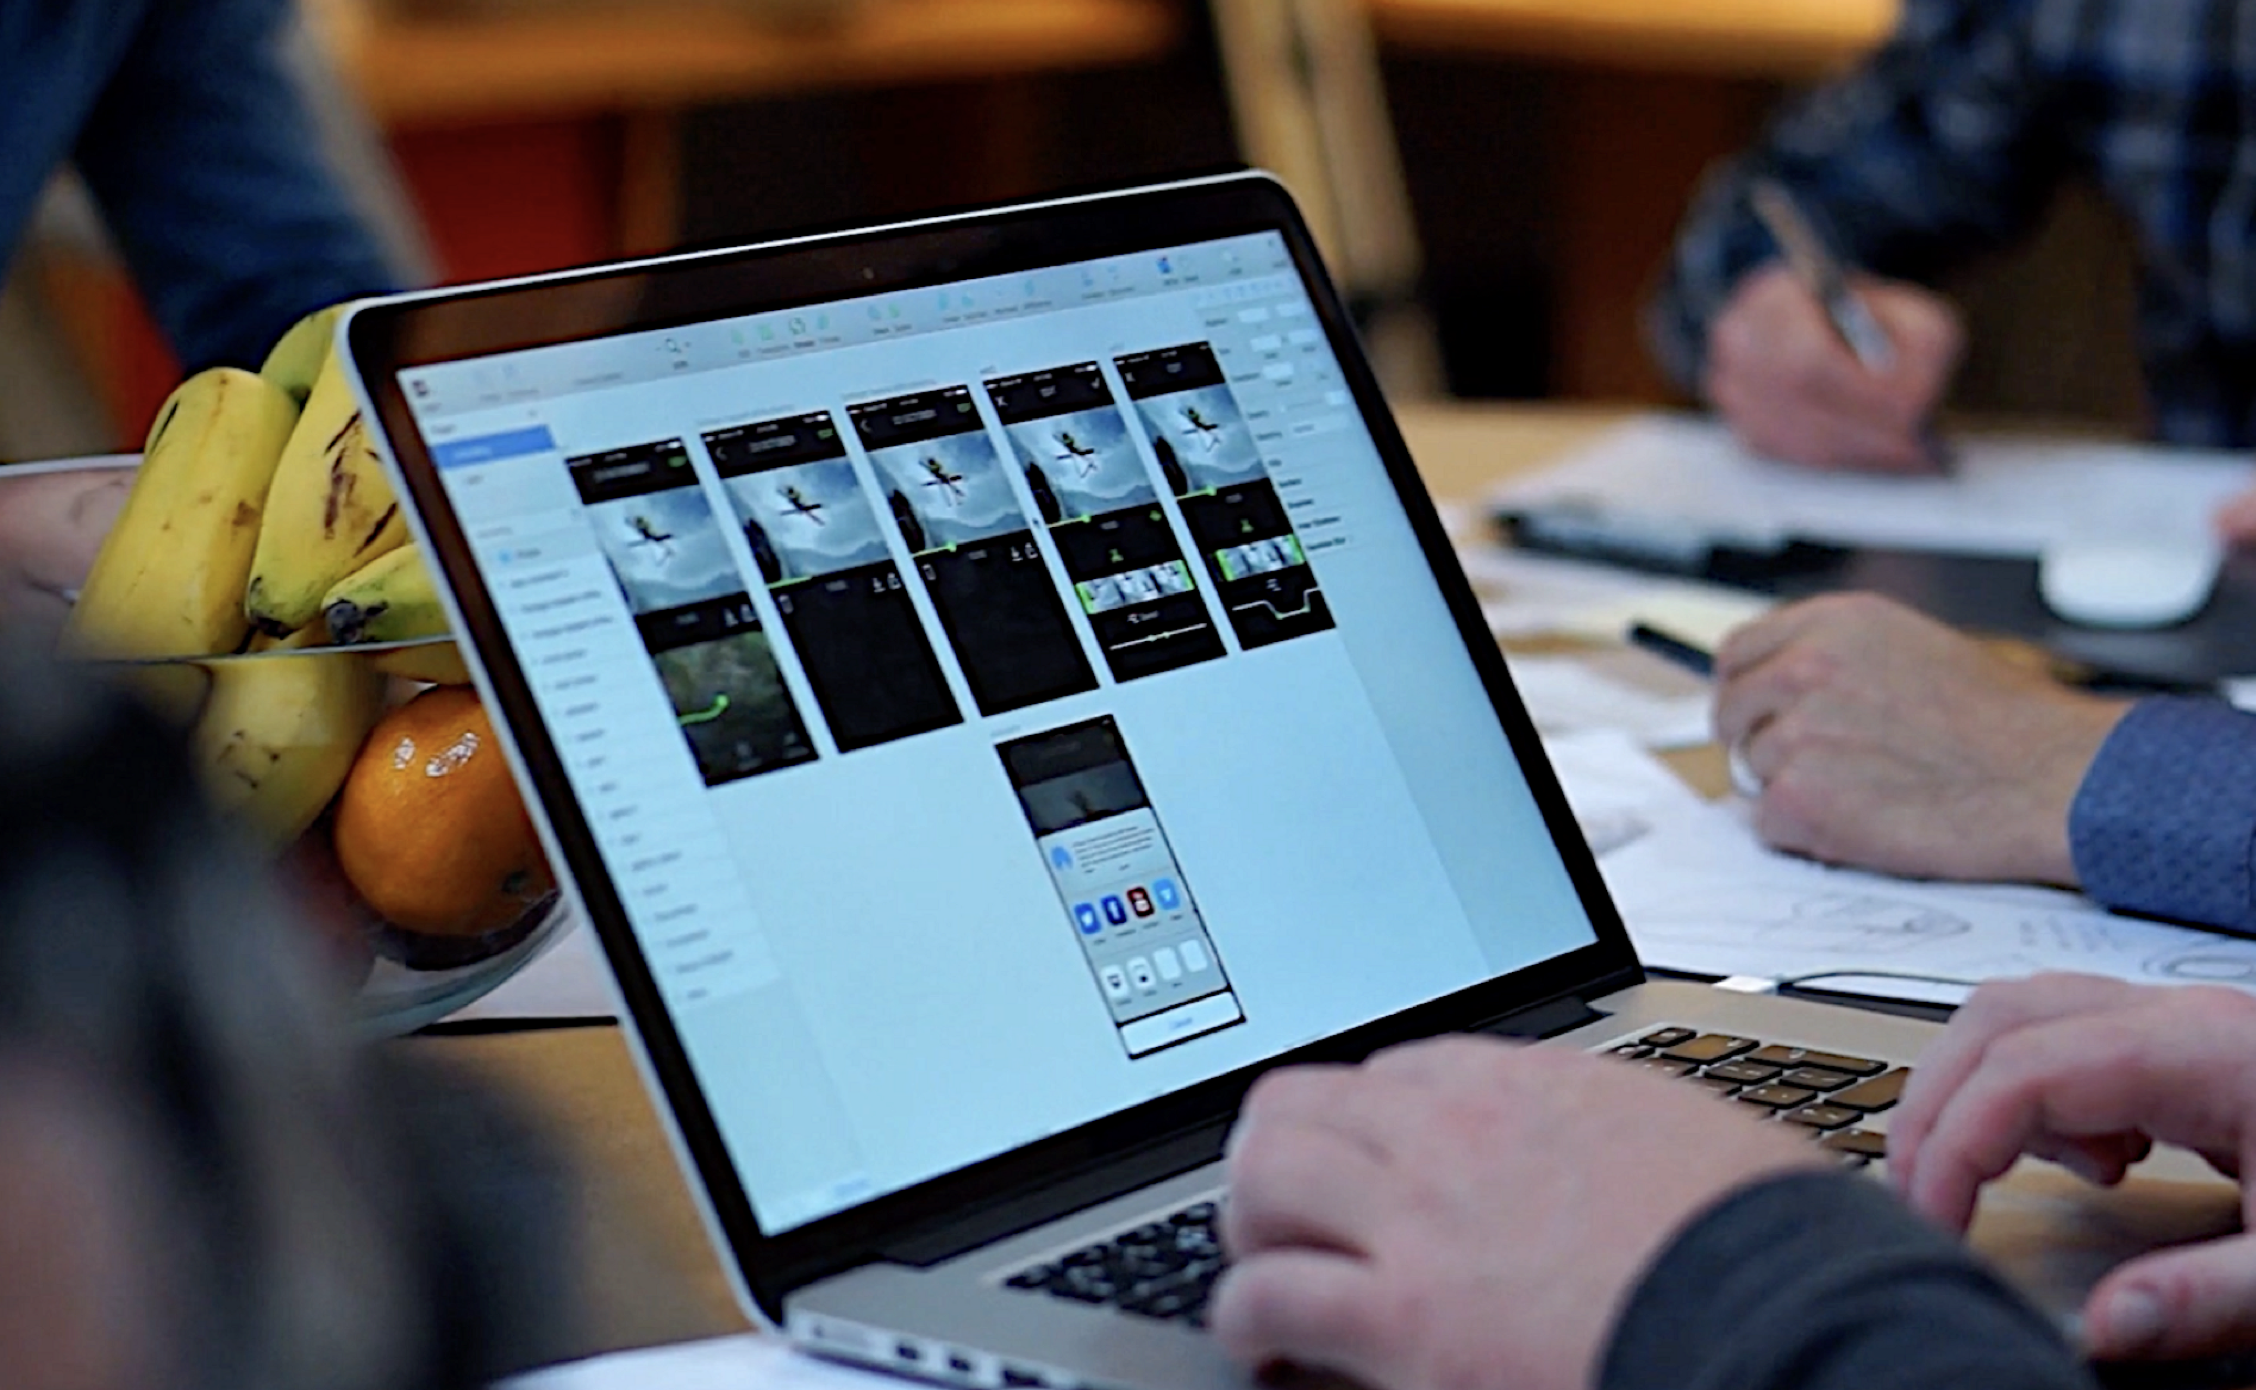
I worked with 3 industrial designers as their sole digital designer to design the onboard camera interface as well as an accompanying native iOS and Android mobile app to control, review and edit media created by the camera. It was to be designed by me with some creative collaboration from the director and then sent to developers overseas to be built. This was estimated to take about 6 months. Most of my involvement was:
Mapping use case scenarios
Researching competitors
Wireframing interface concepts and user flows
Developing a visual design language
Prototyping low fidelity interfaces
Coding hi-fidelity prototypes
Guerilla testing
Delivering hi-fidelity interface designs
Producing build assets and specs
The design objective
Design iOS and Android apps to support the camera's functions.
Help the team develop product feature ideas
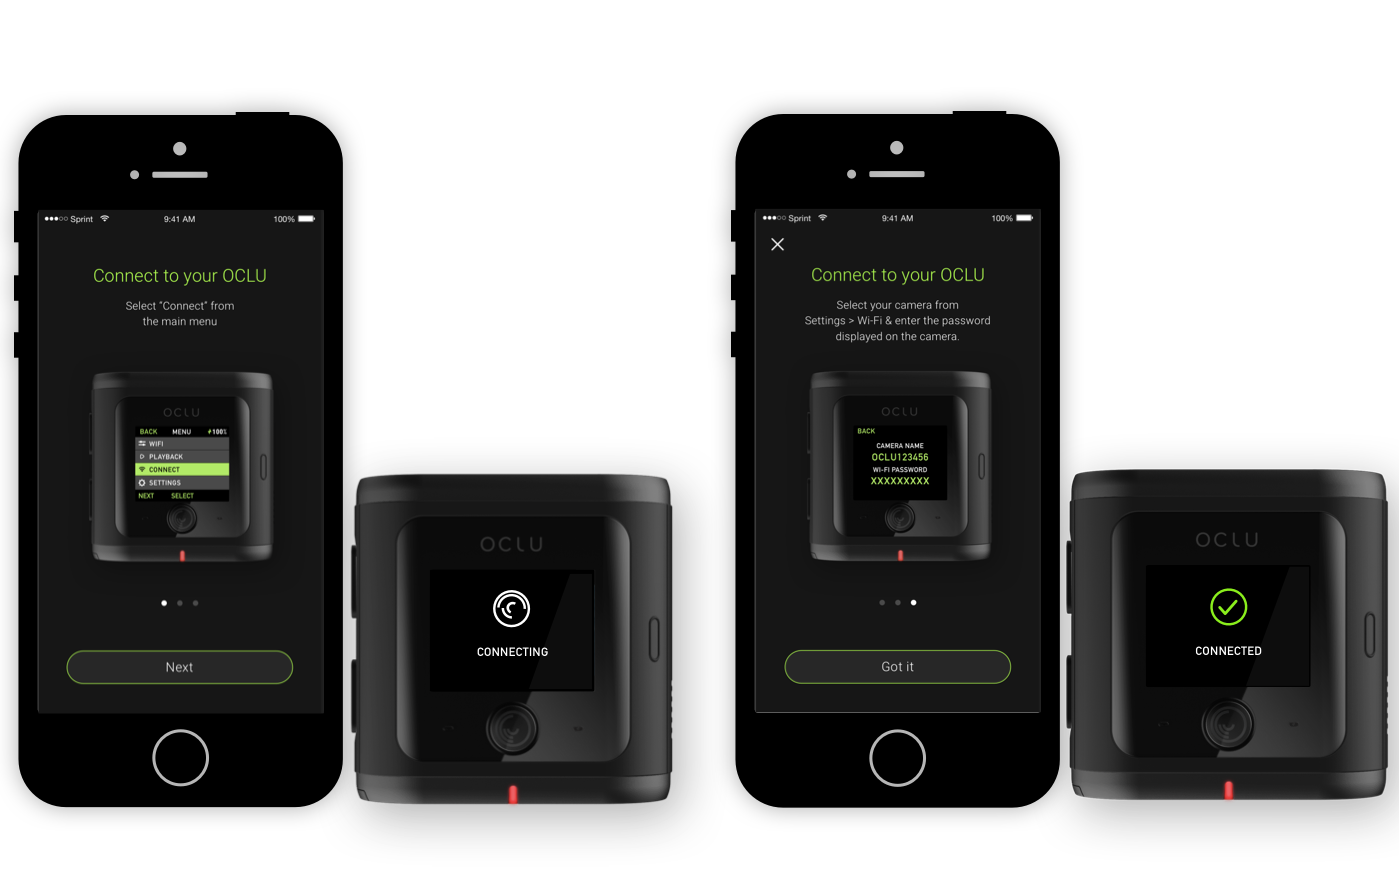
Design an onboarding interface of the OCLU camera.
Develop a visual language to support user interface work
Produce all assets and specs for engineers to build from
Design an onboard interface of the OCLU camera.
Help the team develop product feature ideas
Design the supporting iOS and Android apps to support the camera's functions.
Develop a visual language to support user interface work
Produce all assets and specs for engineers to build from
Mapping out adrenaline junkies and their activities
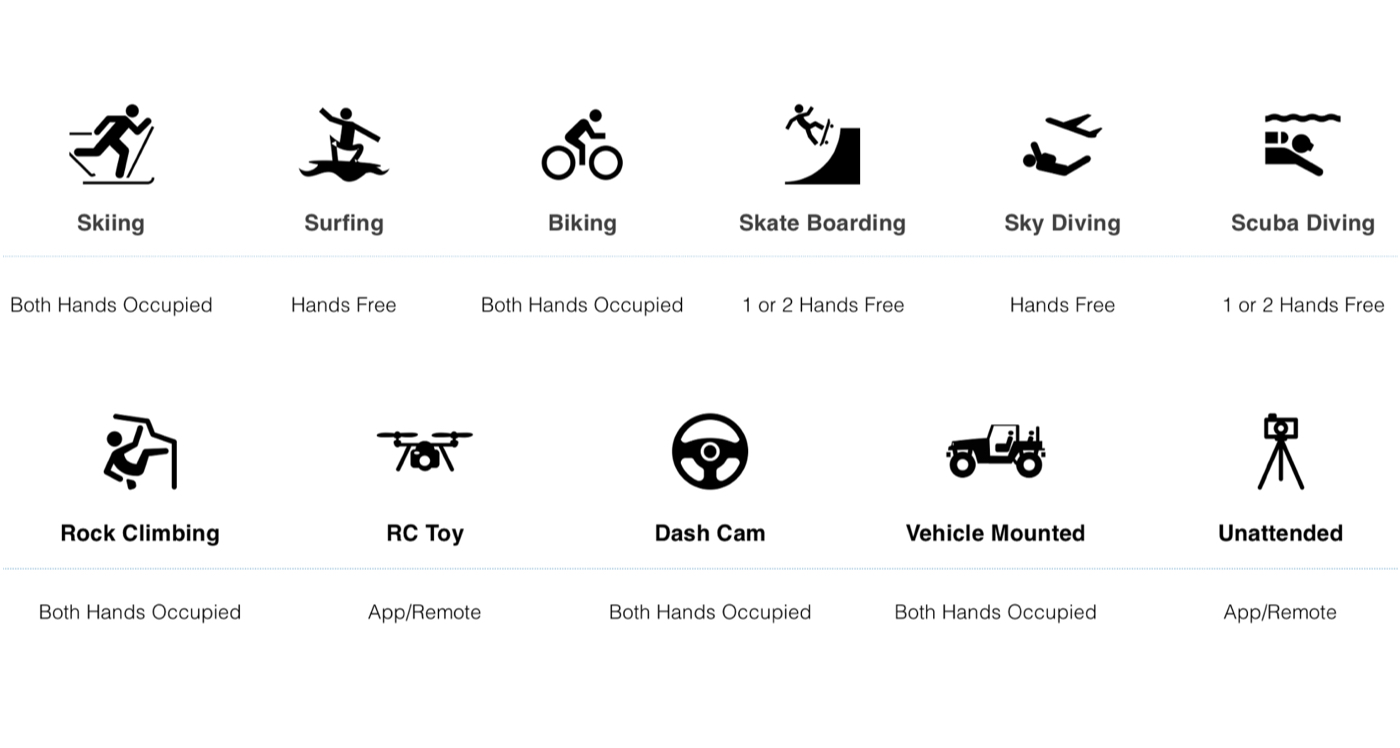
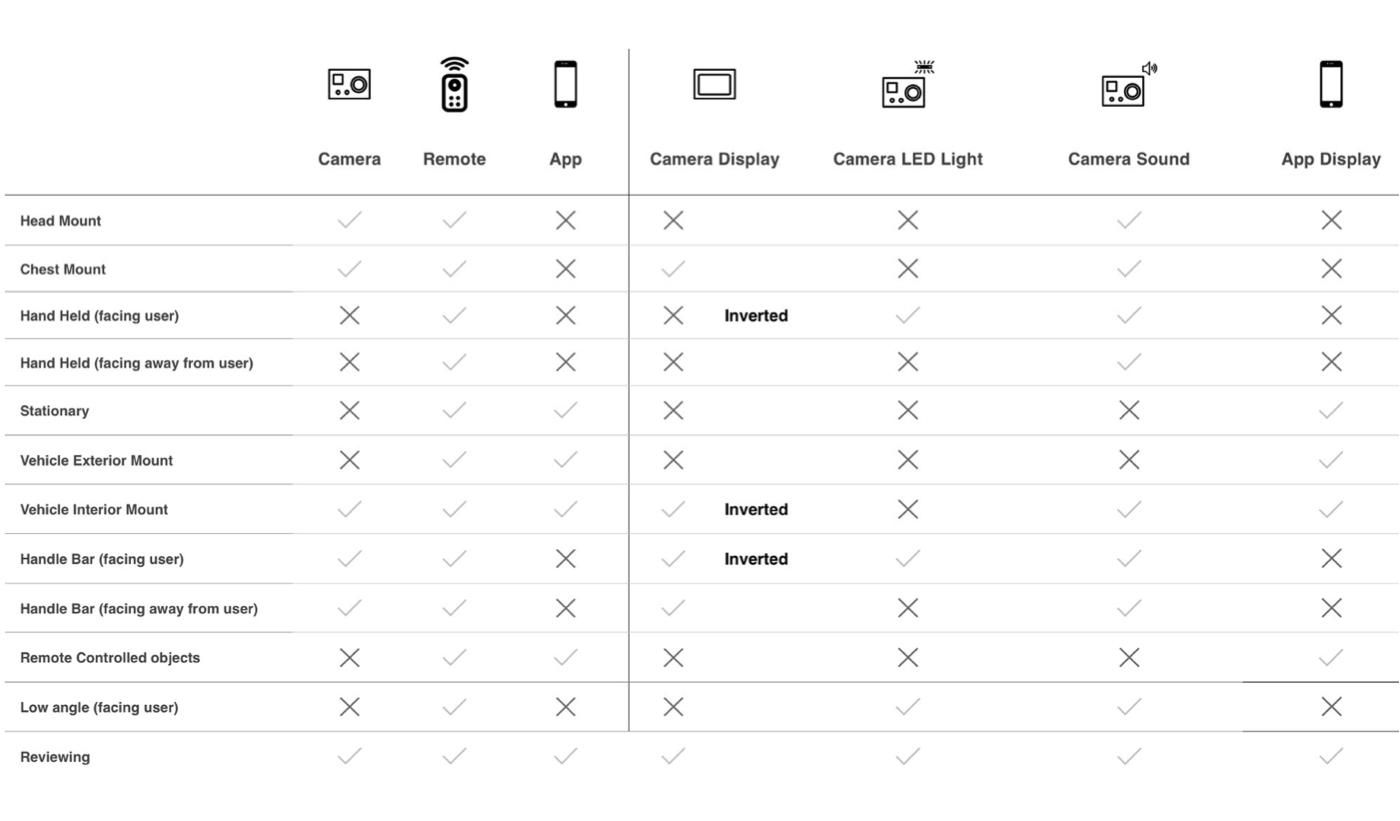
As there is such a diverse range of activities that people film, with the help of the team’s early accessory mount prototypes and some of my own research I learnt how preoccupied a user could be concentrating on the actual activity and which hands are available.
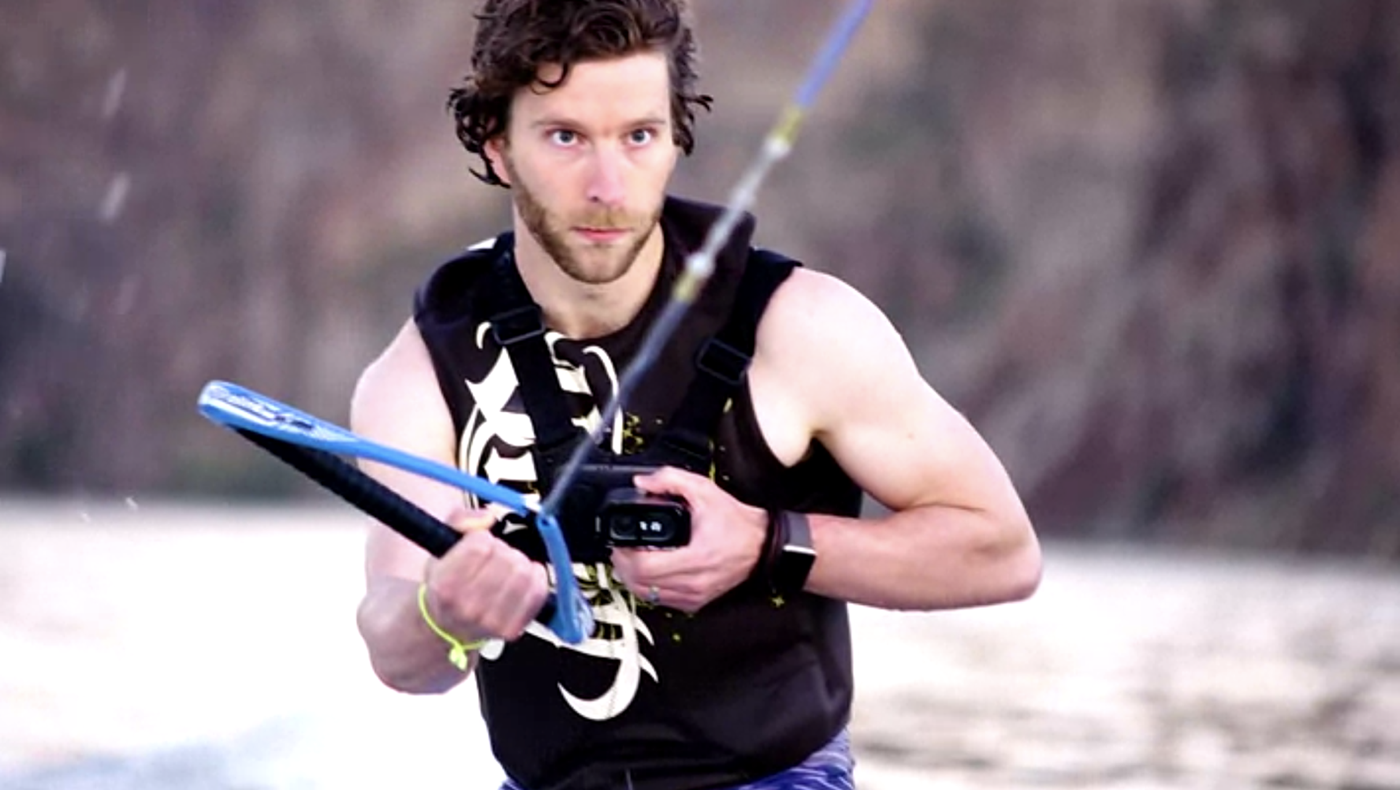
I mapped out the environment and proximity of the camera and app to the user in most popular filming activities to learn what feedback and input were required from the system. In some use cases, such as a head-mounted camera, the user can't see anything.
Building an ecosystem
Building a multi touch-point eco-system can easily result in being a disjointed experience. I mapped out the basic user flow to ascertain what each touchpoint’s job should be.
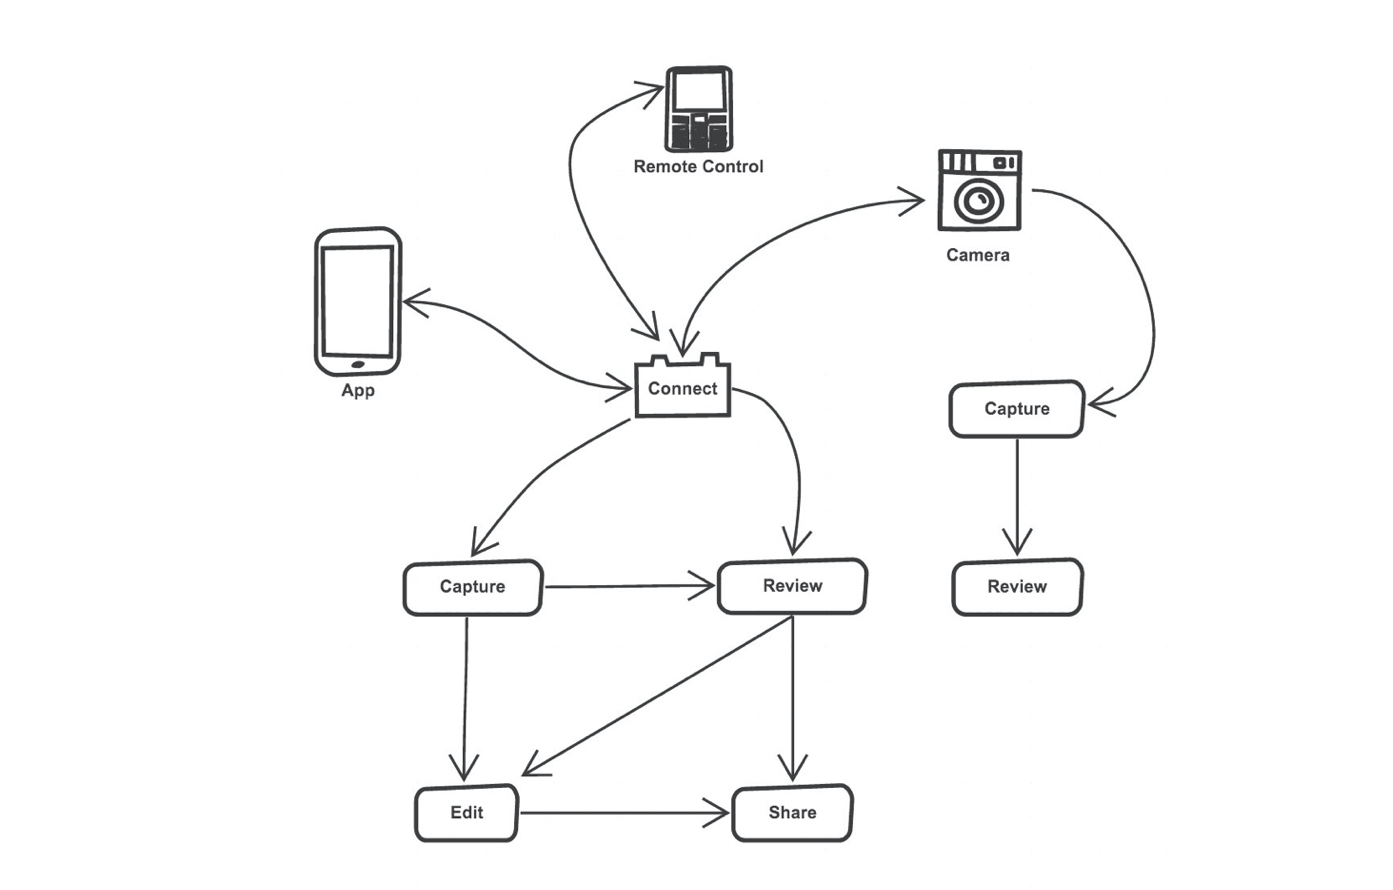
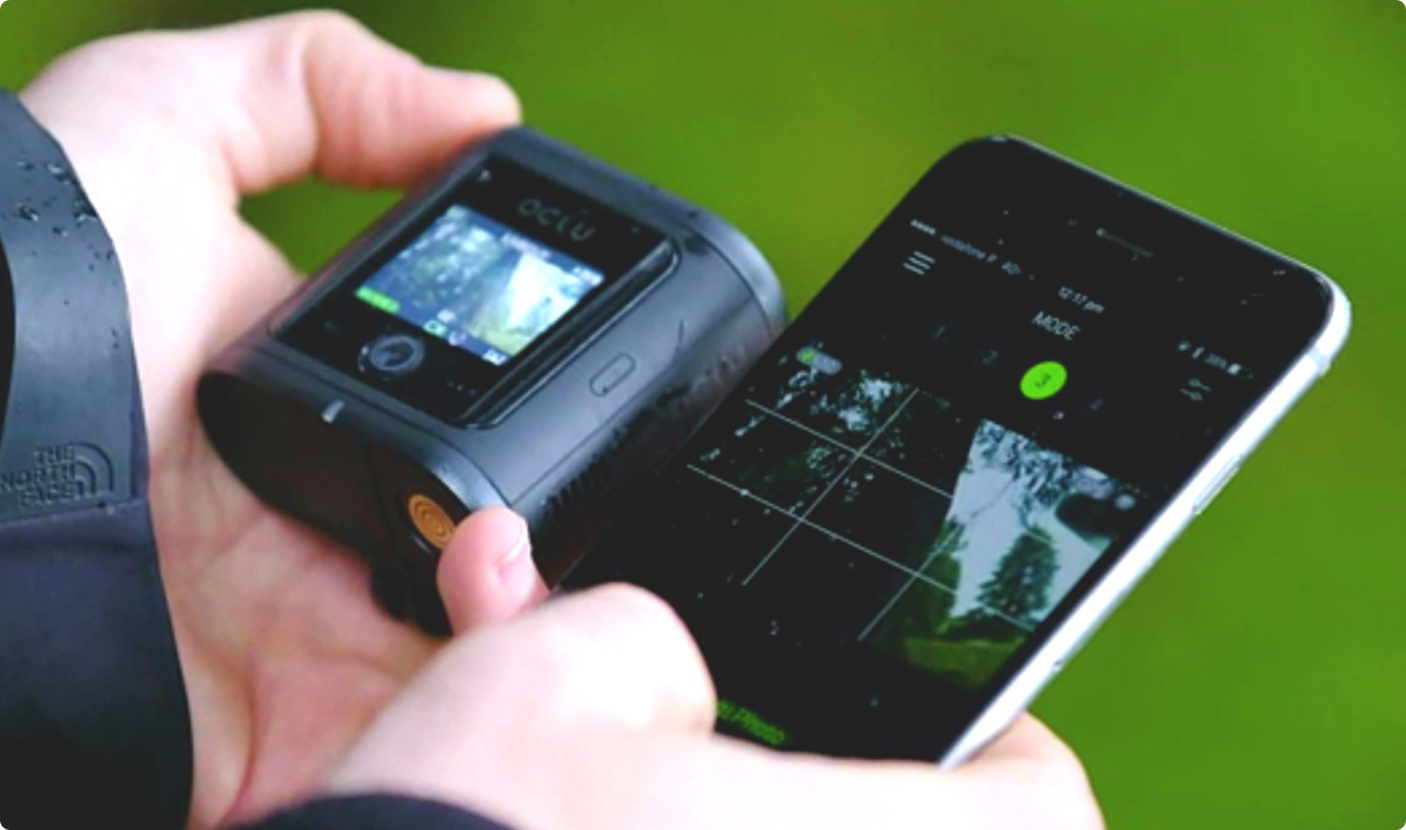
A lot of hardware manufacturers create very different experiences on their physical product and mobile app counterpart. Almost making it seem as if they were made by different companies. I wanted to ensure there was a consistent and transferable experience between hardware and mobile app when users switch from one to another despite the difference in form factors and screen display technology constraints.
Competitor research and ideation
After doing some competitive research on interface patterns, camera functionality and visual identity, I had to ensure what I was designing was both unique and reflected the cameras capabilities and selling points. While on the project, new cameras were coming out on the market, so I had to keep my eyes peeled to see industry advancement which was rapid. The OCLU camera's technical capabilities also constantly changed, so I had to cater to those changes by consciously designing with a systems mindset knowing that things can change.
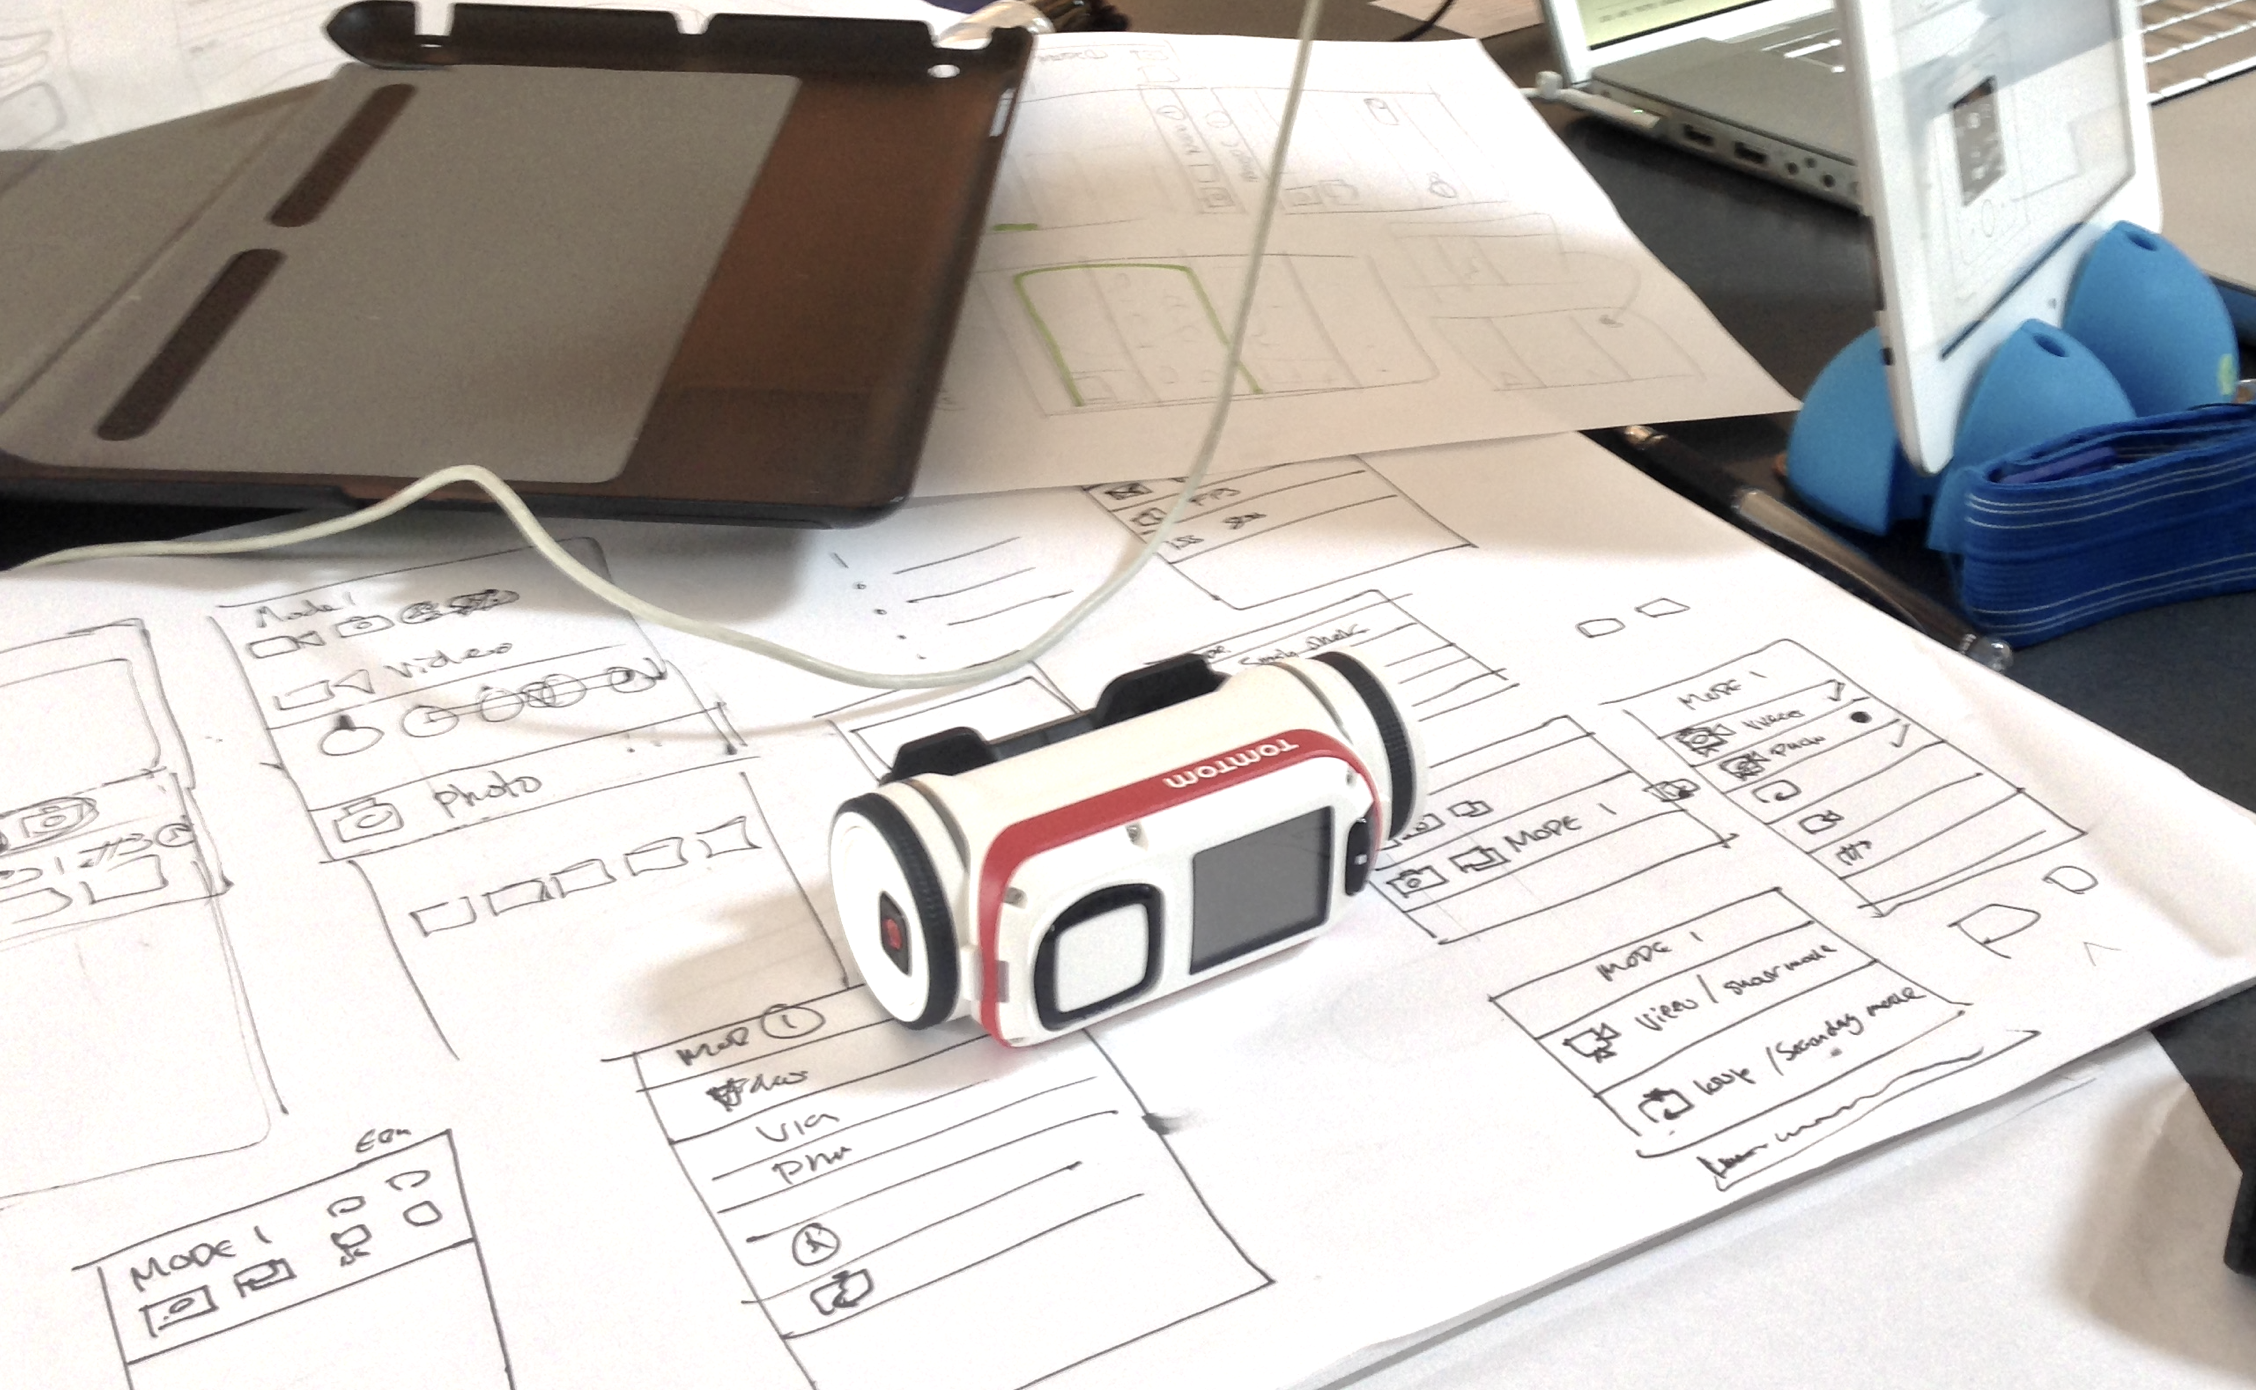
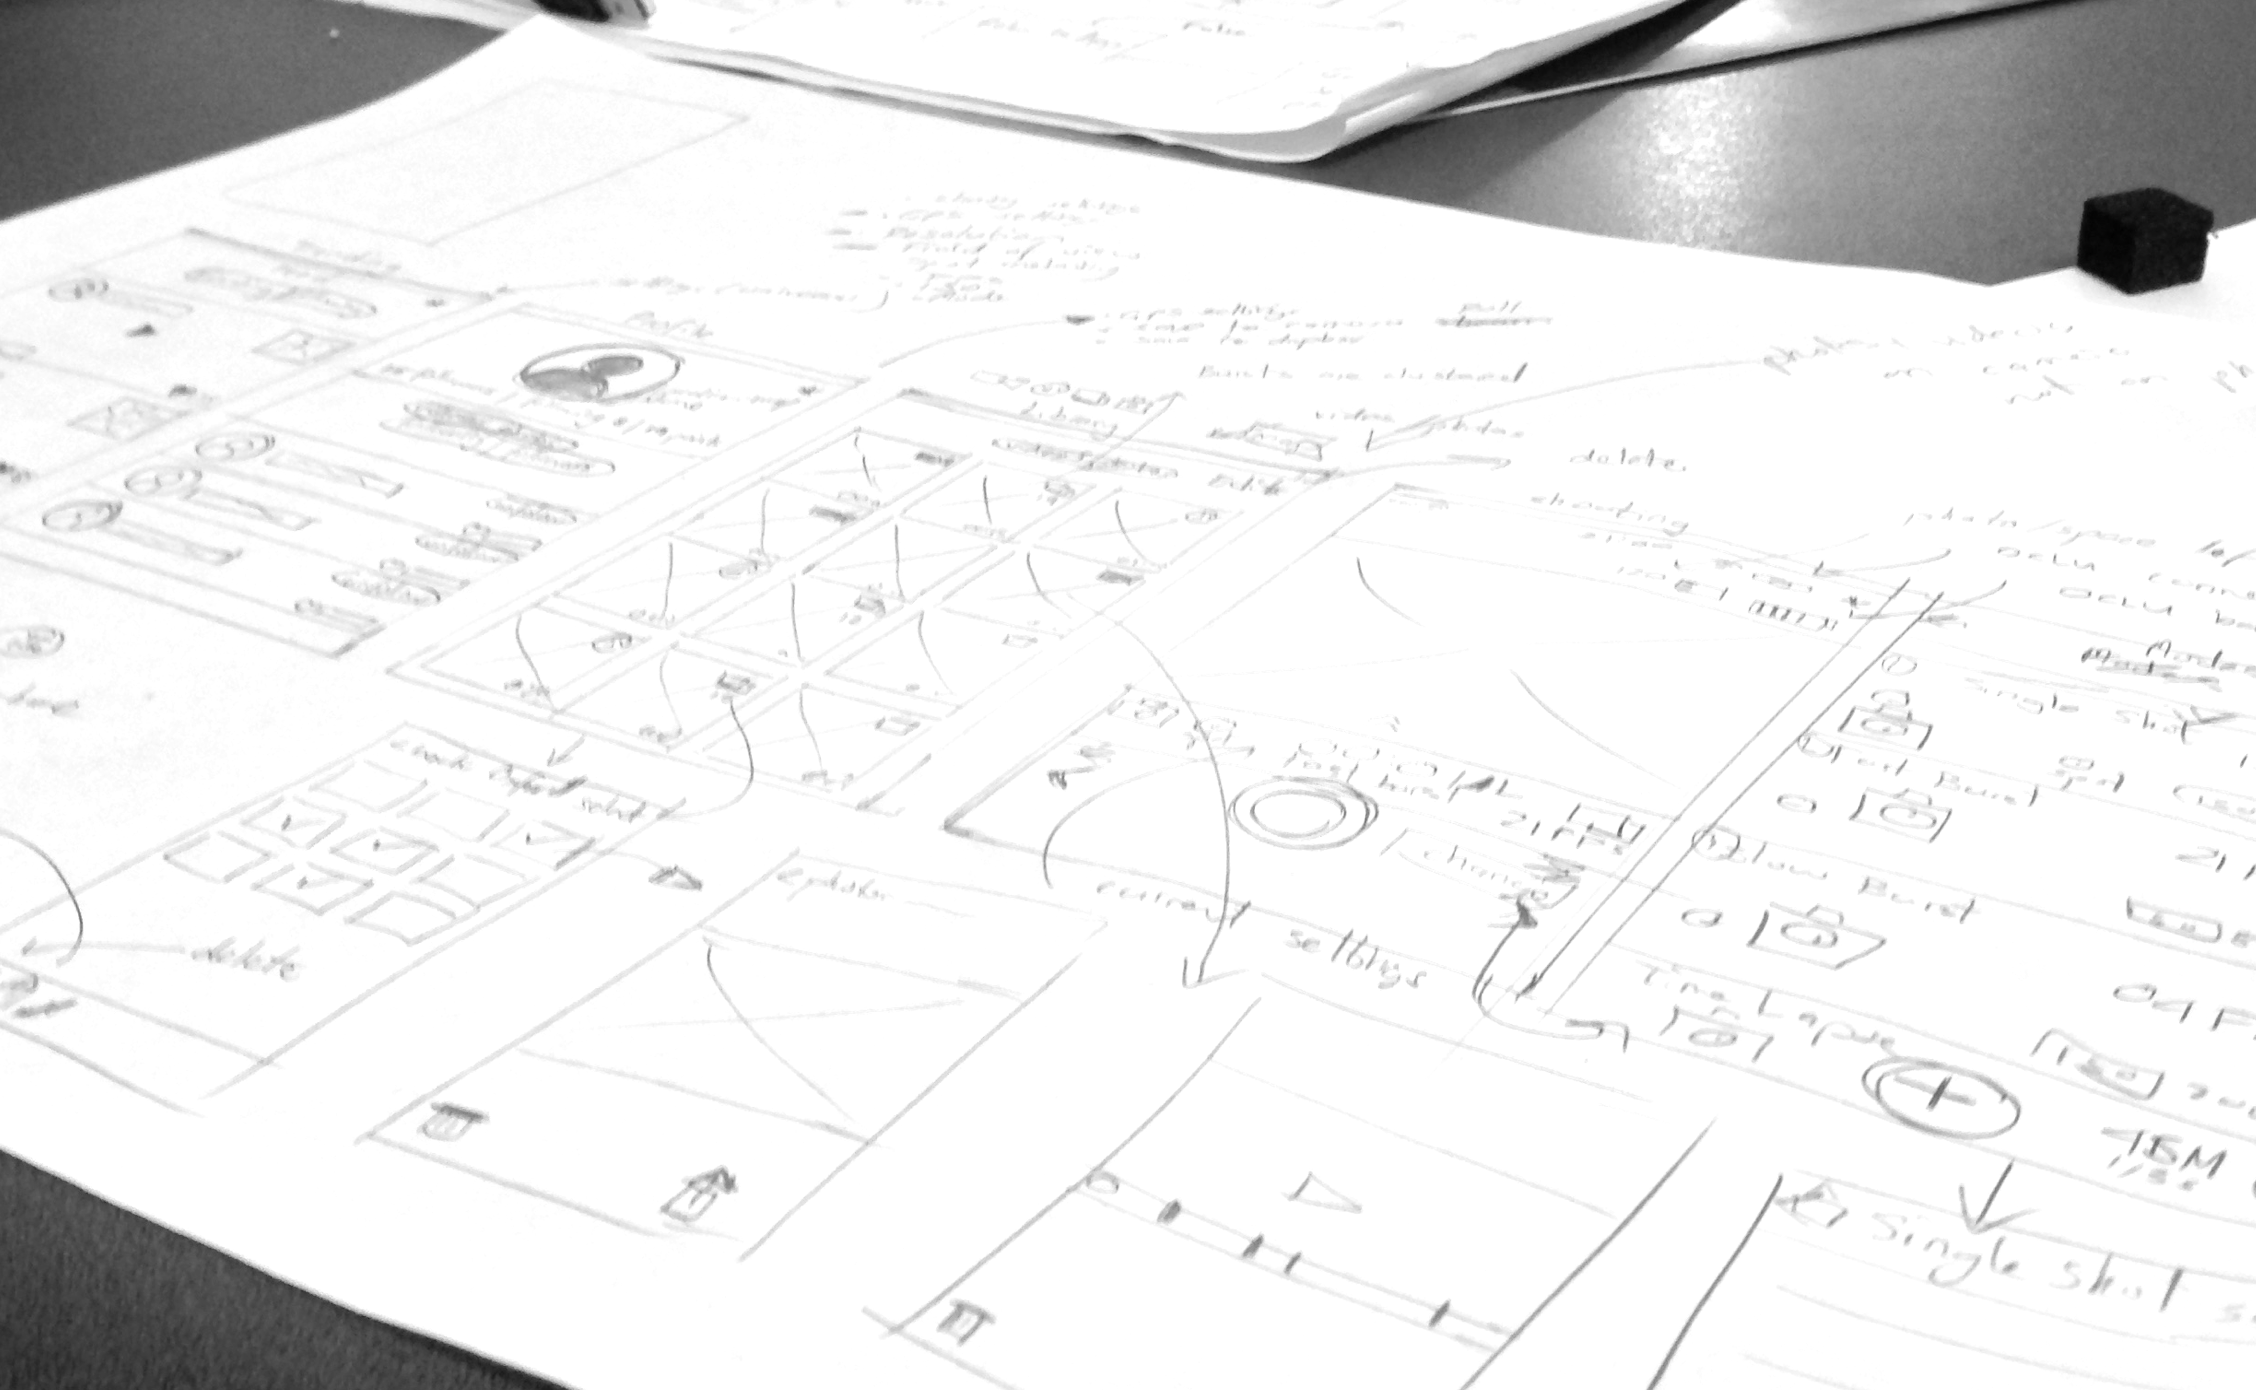
Developing a visual design language
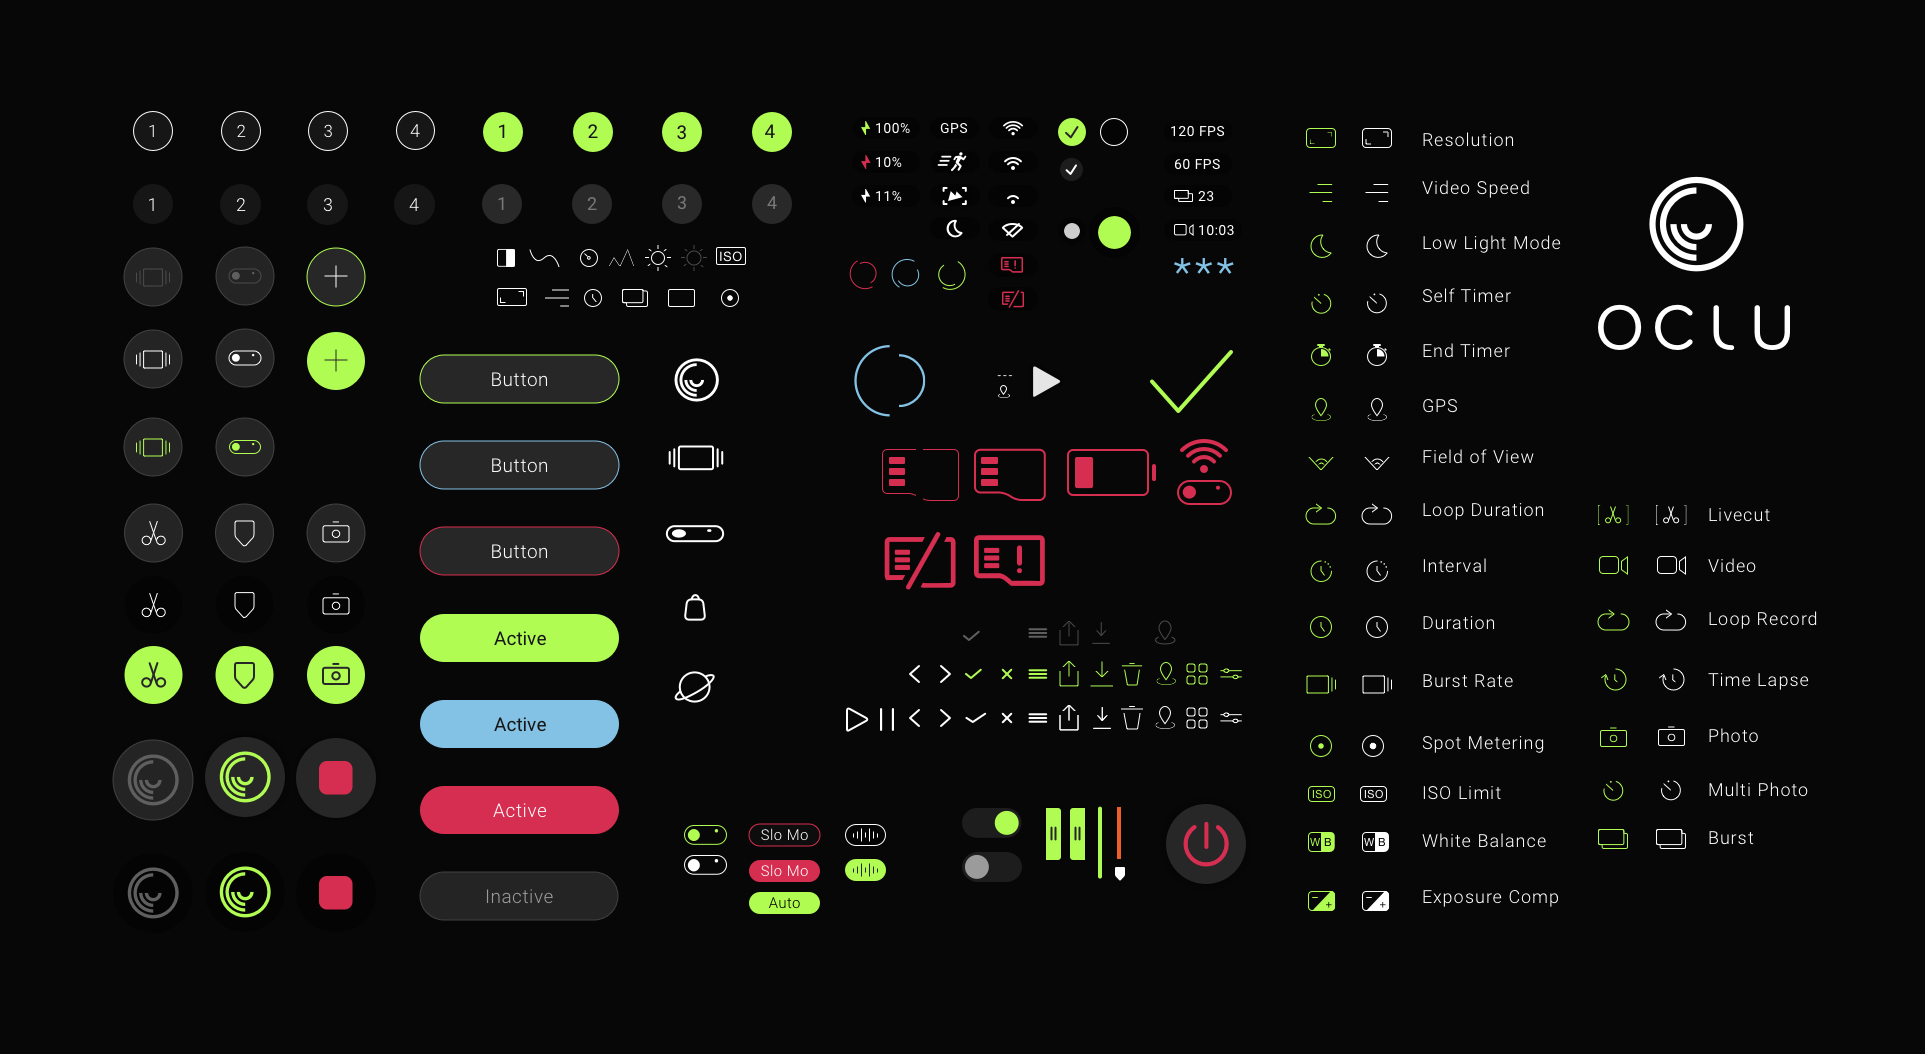
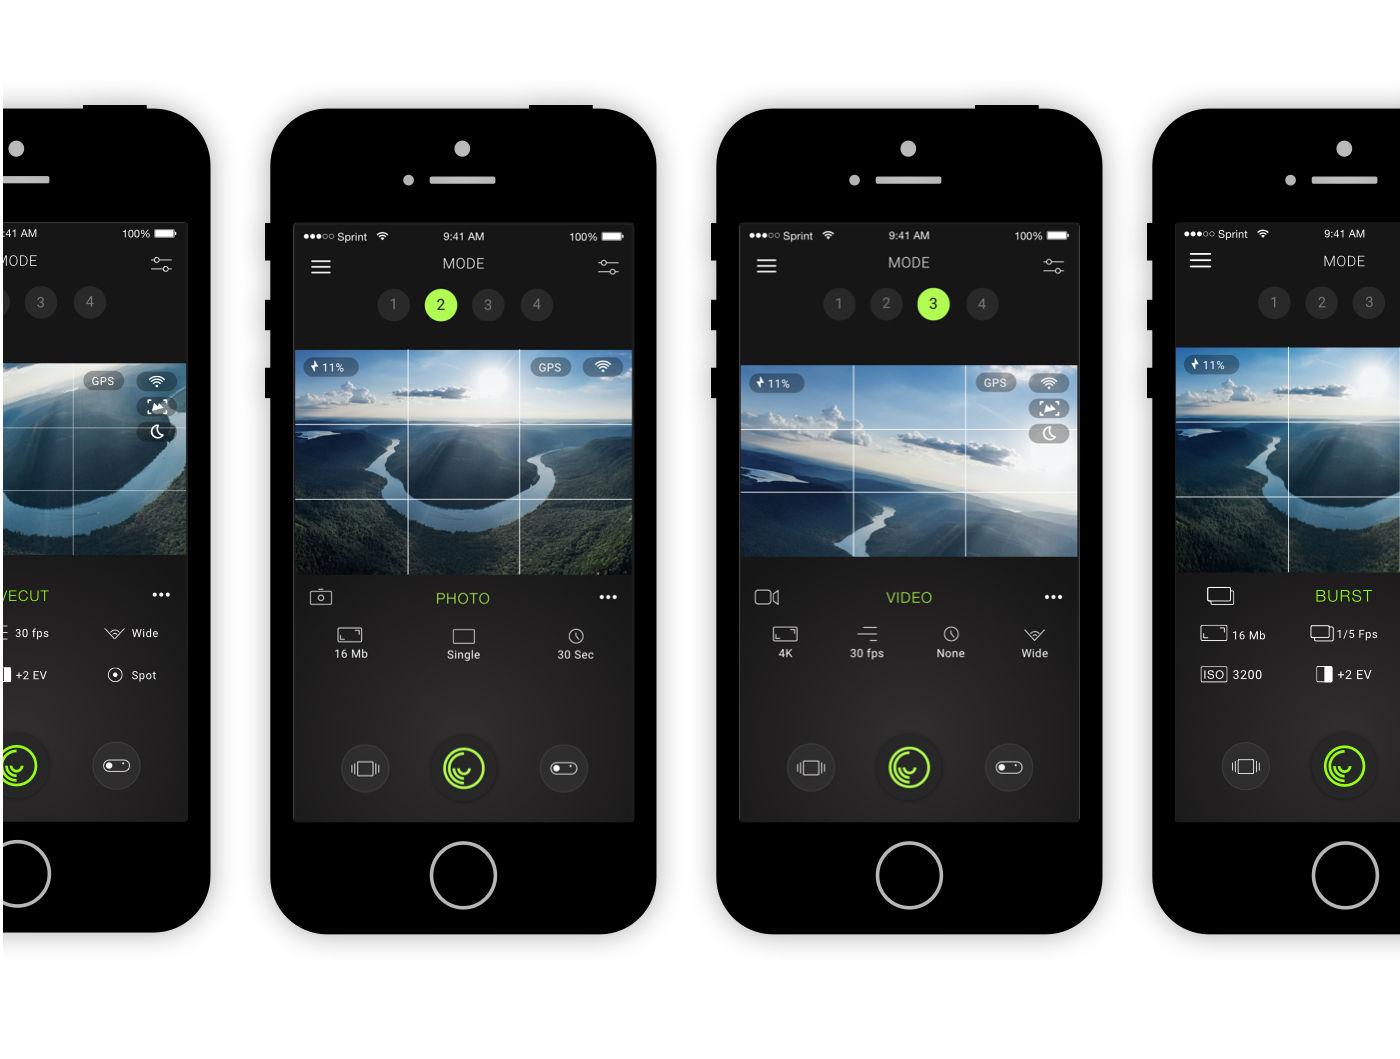
As I worked my way through the project, I developed a visual language based on the cameras form factor, the logo and brand colour palette direction. I created the iconography that supported the technical capabilities of the camera. I tried to keep the technical jargon to a minimum throughout the whole experience. The team still uses this visual design language to further develop the camera system vocabulary.
I explored the design language further by creating some animated elements in adobe after effects. Here is the logo animated with background particles to simulate that underwater feeling with a mixture of greens to match brand pallette. OCLU now has changed to a blue hint colour.
Using these platforms for this project was frustrating, to say the least. With lag time, poor performance, bugs and lack of versatility, I needed a more expressive platform. I bit the bullet and decided to use Framer JS which required a bit of coding in CoffeeScript (poor man's javascript). This gave me more control over micro-interactions, gestures with better performance.
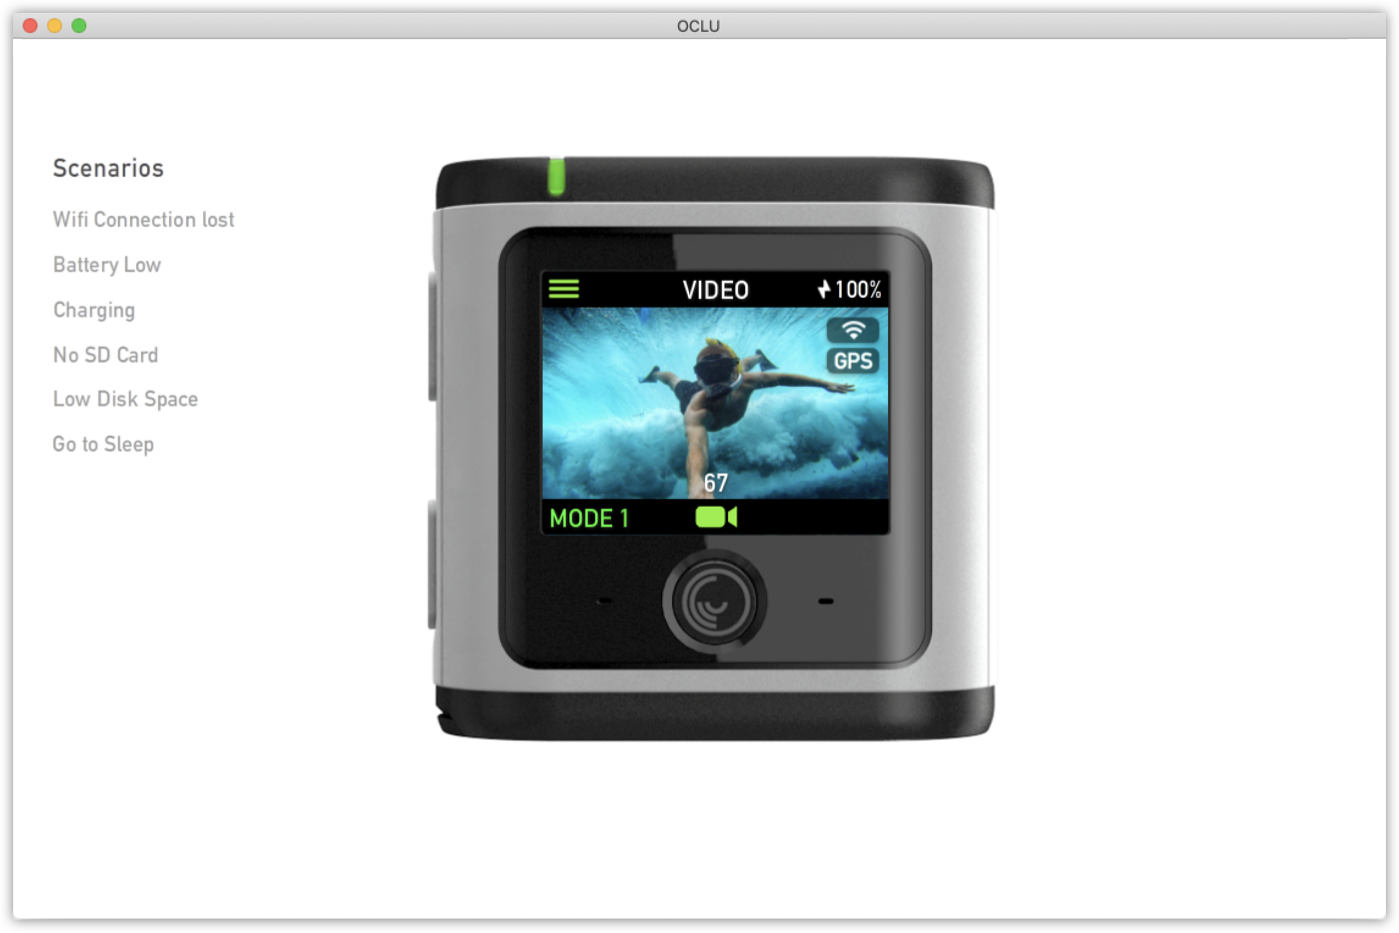
I ended up coding the entire camera ecosystem in ActionScript 3 and deployed it as an application for desktop. This helped the team visualise how the sounds, LED lights, physical buttons and onboard screen UI would together. The engineers in Taiwan also used this to build the camera.
Testing was quite difficult without hardware being built to realistically facilitate real-world interactions. This was also a new product under development, so it needed to be quite discreet. I conducted guerilla testing with people I knew who were most unlikely to engage with photographic equipment as well as more people with more advanced technical photographic knowledge. I tested elements like understanding iconography, menu systems and gestures.
Customising shooting modes
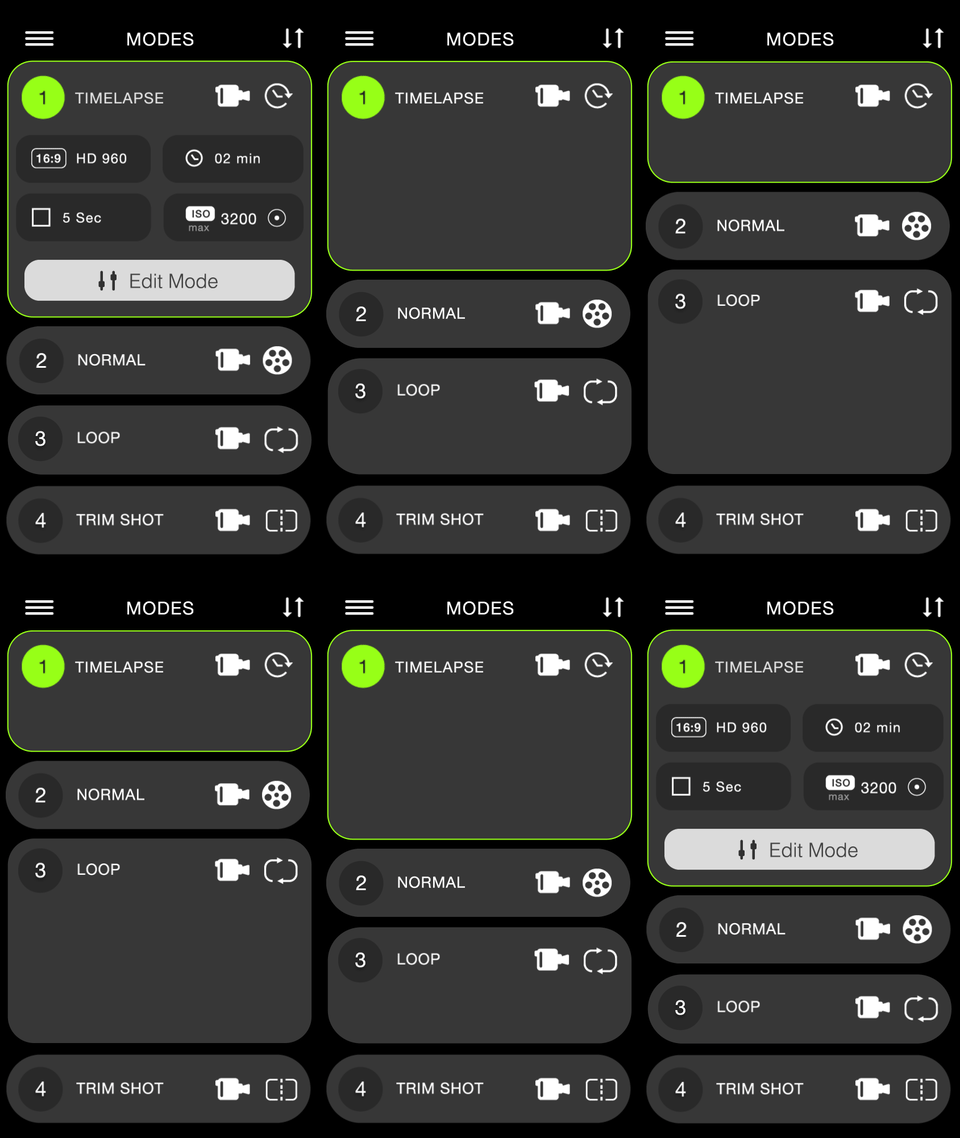
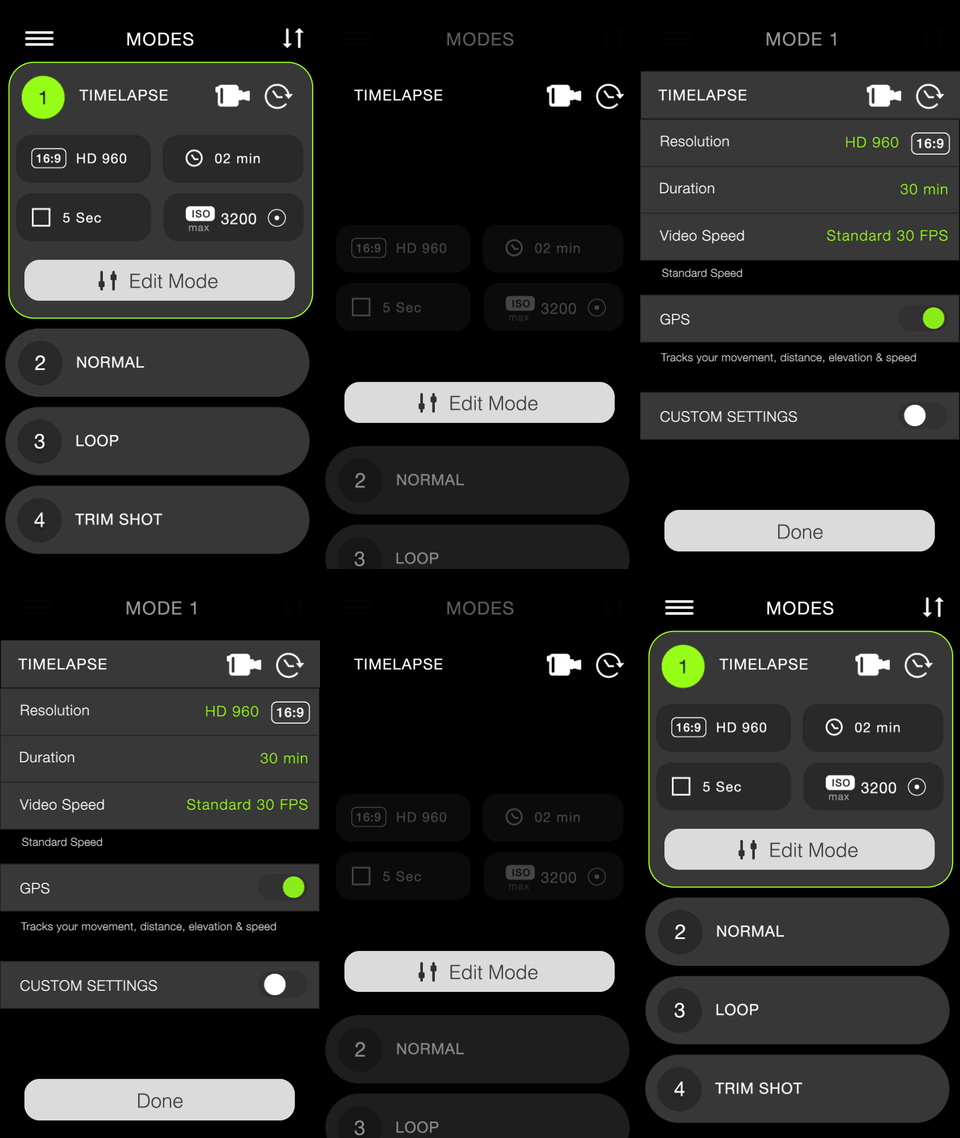
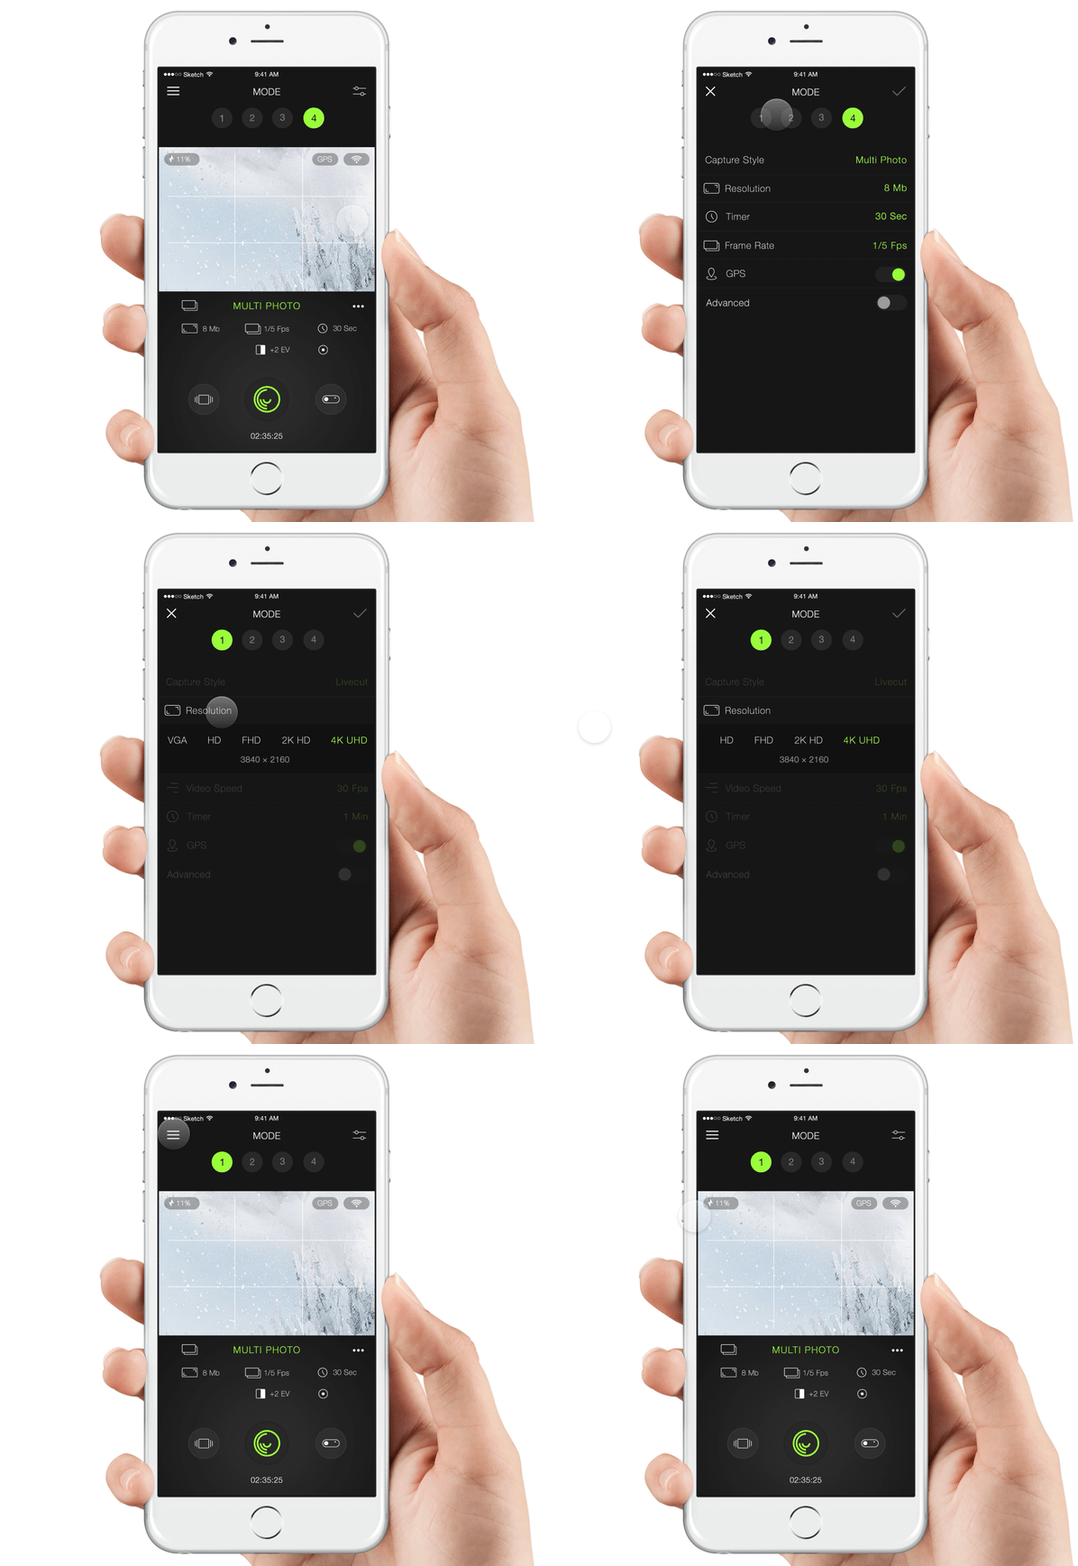
As part of the main USP of this product, there are four modes. Each mode can be customised to the user's preference, stipulating the shooting style such as photo, video, burst photo, loop record etc...
I started by utilizing the lozenge shape from the camera profile with the number of the mode to the left, I prototyped a few interactions and transitions to see how this would pan out. Although it was such a strong visual concept, it was quite awkward to interact with, too many elements looked like buttons and also required many steps to actually edit the modes.
I attempted to use the same 1,2,3,4 mode buttons in the same way as I did on the mobile design but we were short on space. Using the text on the camera screen was more compact but still recognisable through colour and name. Together with the head product designer, we established some interaction patterns for the camera to create consistency in button location and type of action.
Switching between recording modes
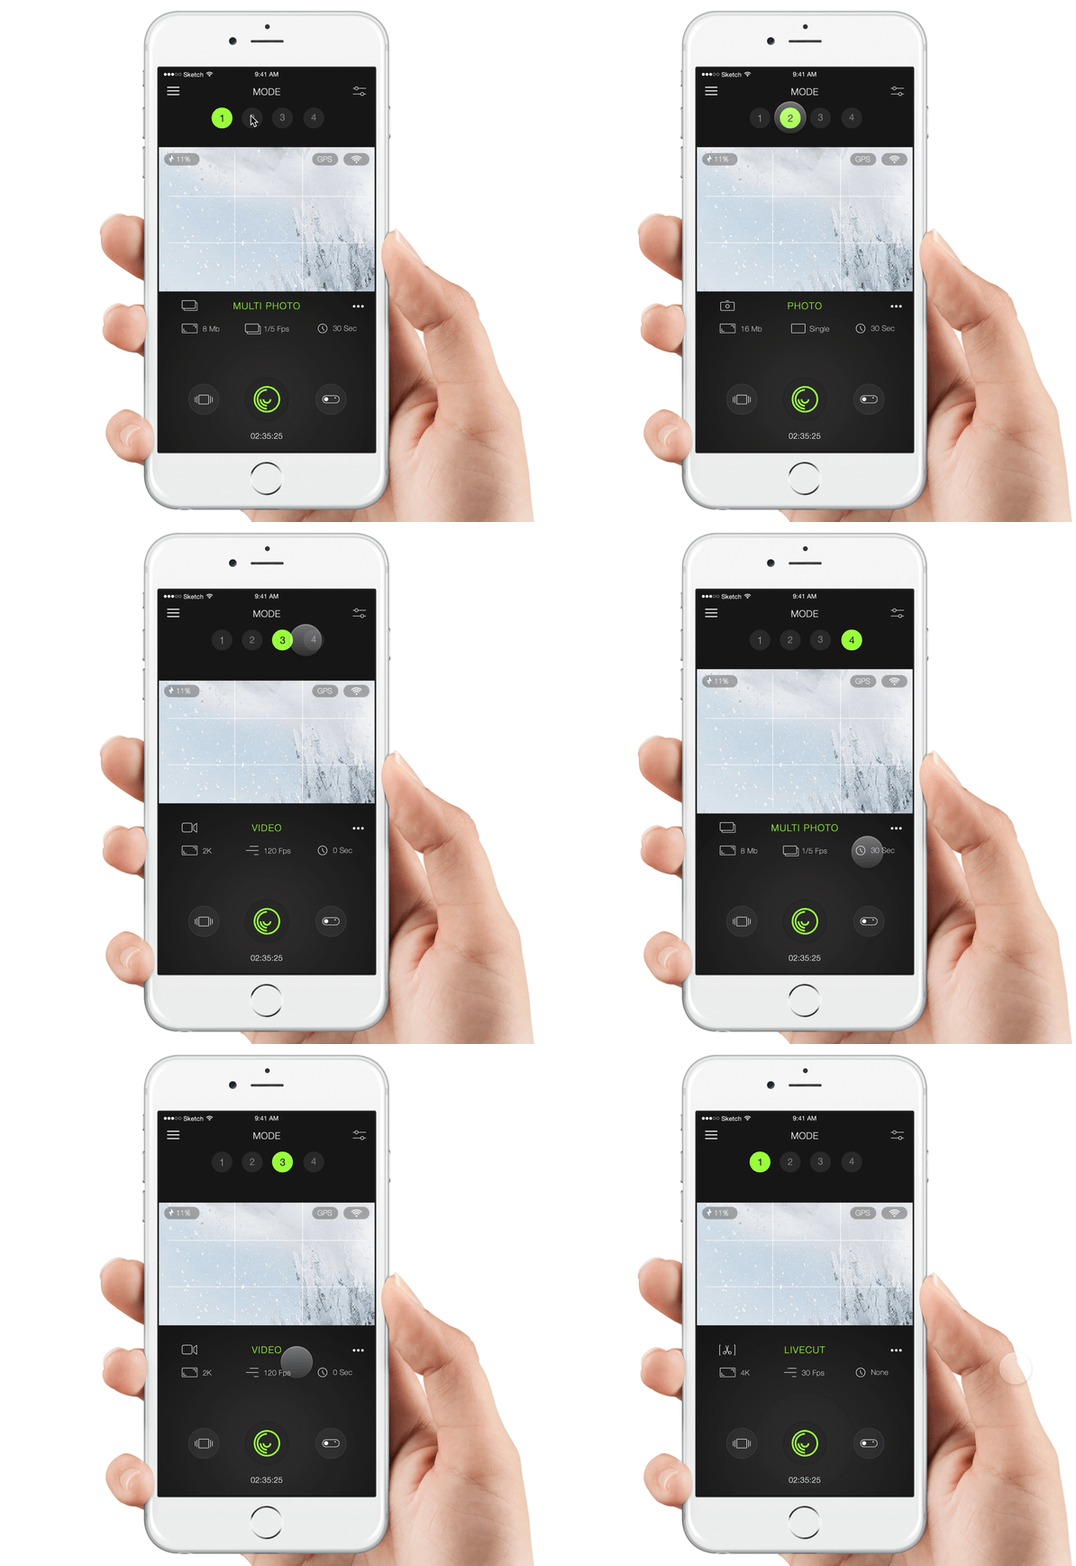
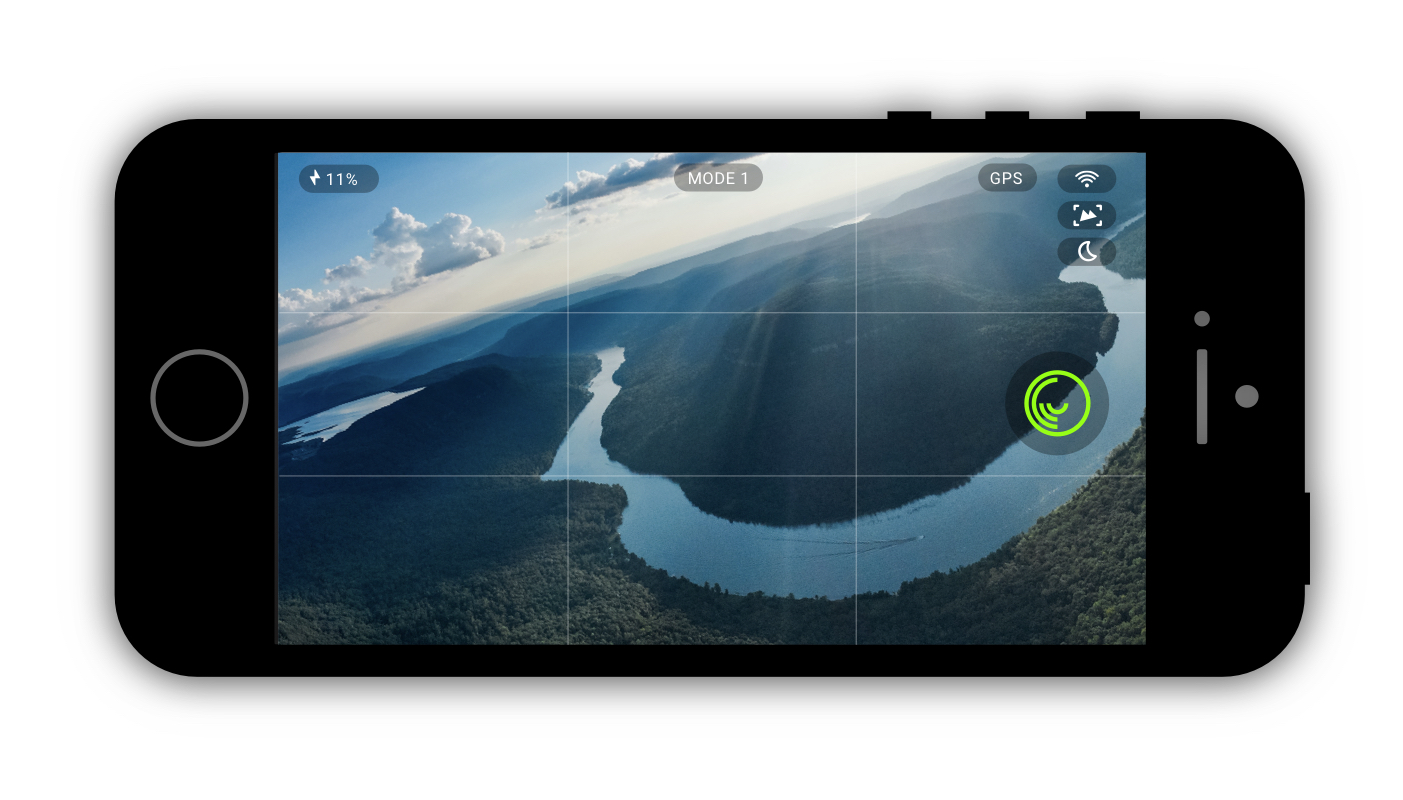
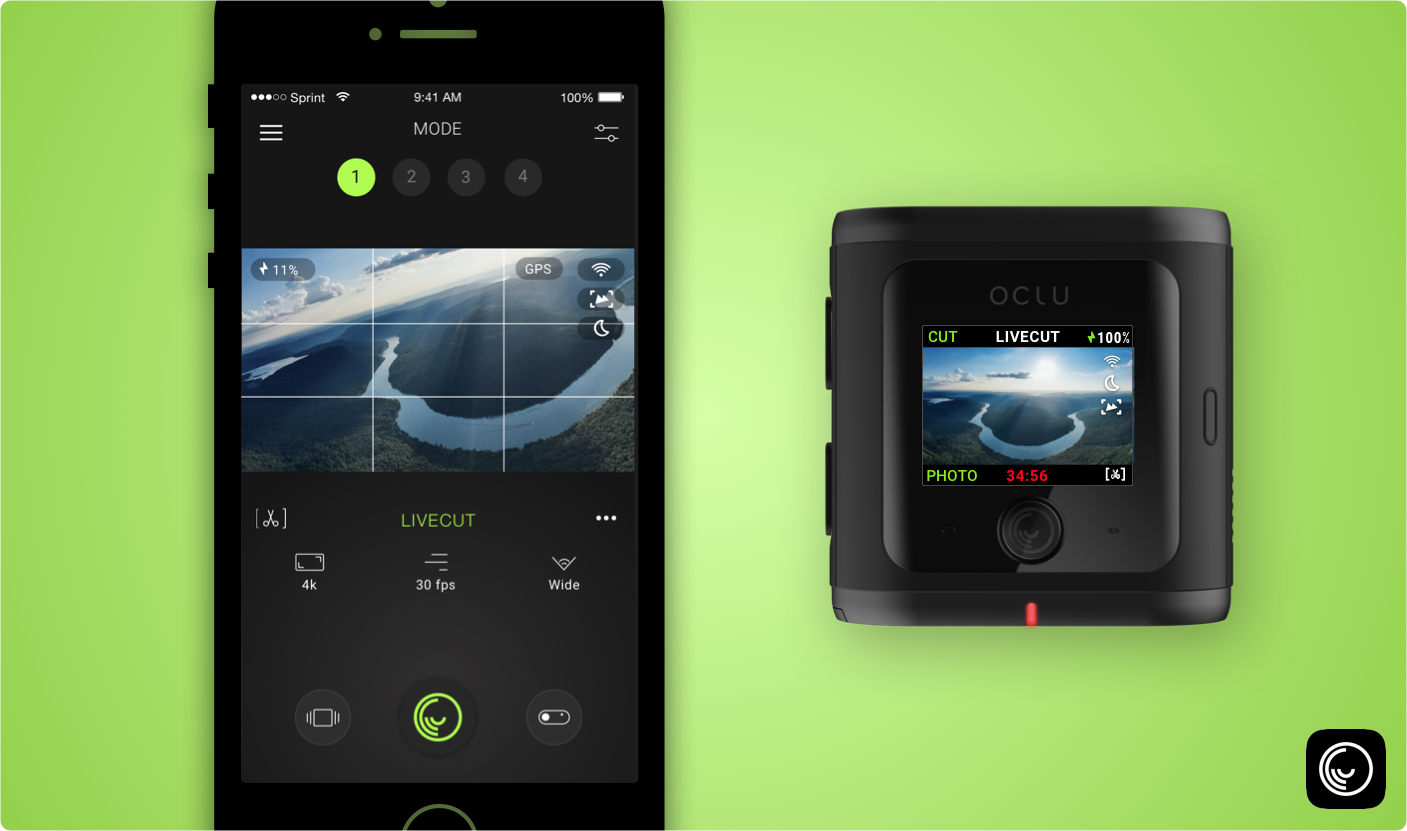
After the user has set up their modes they need to be able to view what mode they are in, the settings as well as the appropriate aspect ratio of the video view. Having this view on the phone enables people who are remotely filming with their camera.
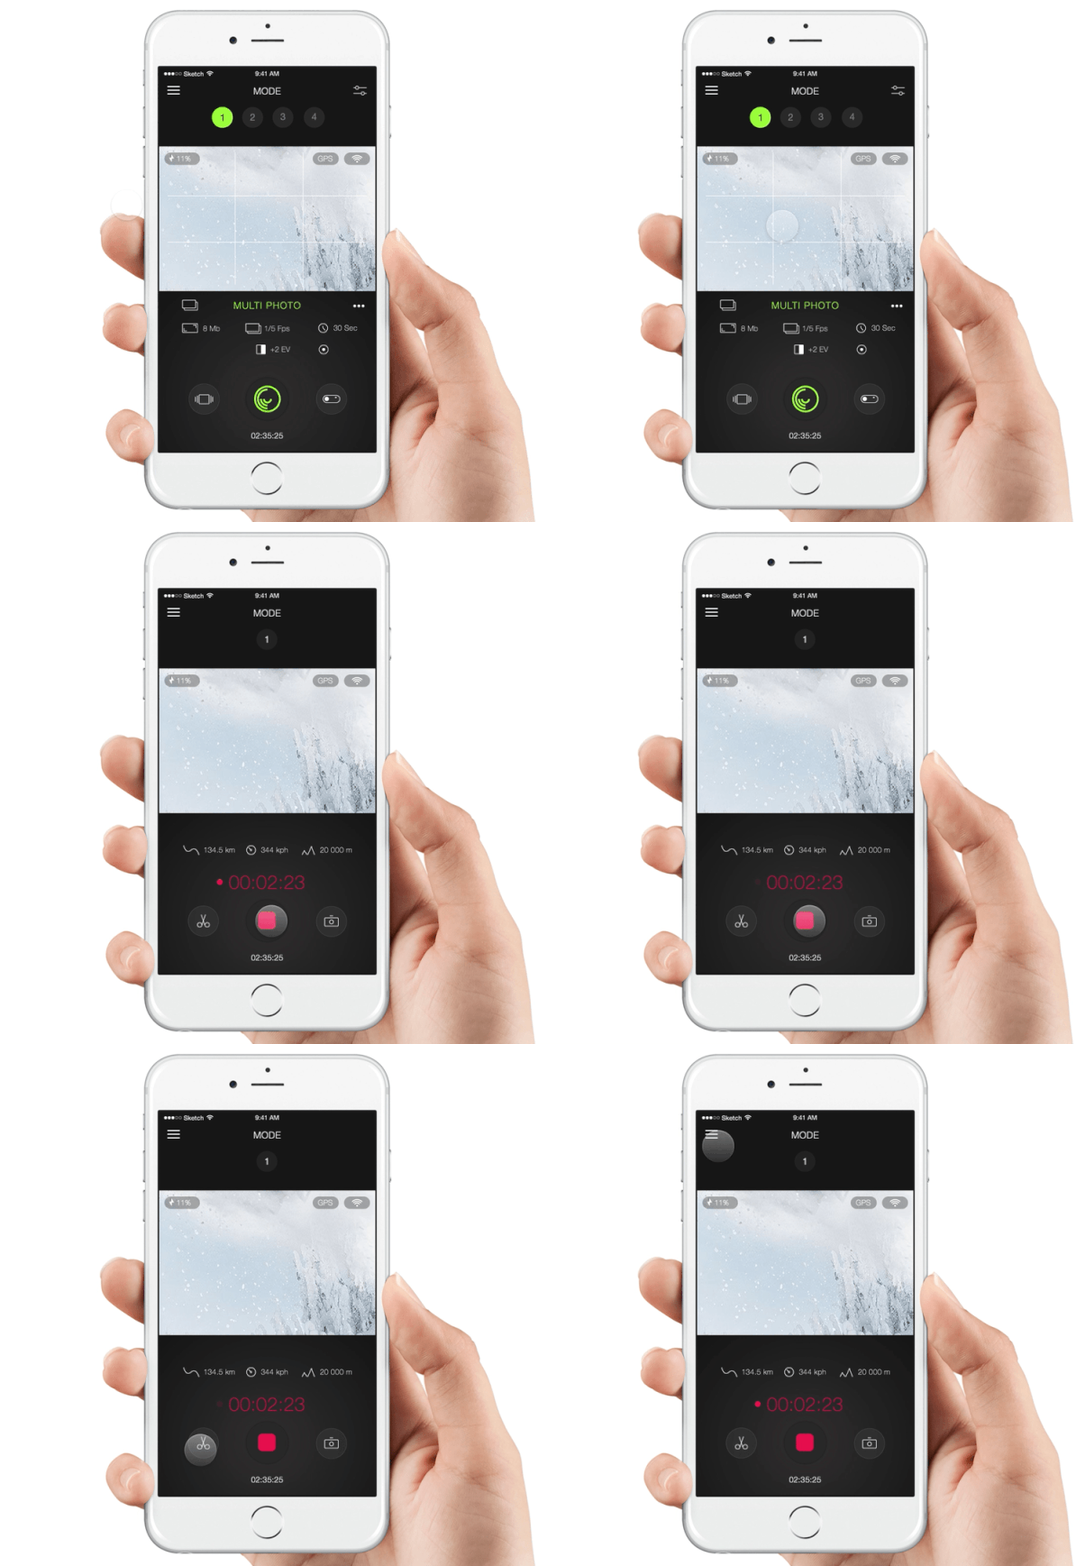
I used the same interaction technique of tapping on each mode at the top of the screen to let users toggle through their modes. As well as tapping, I believe you should have more than one way of triggering actions as in increases discoverability and caters to peoples different hand gestures. I also enabled a swipe as seen below.
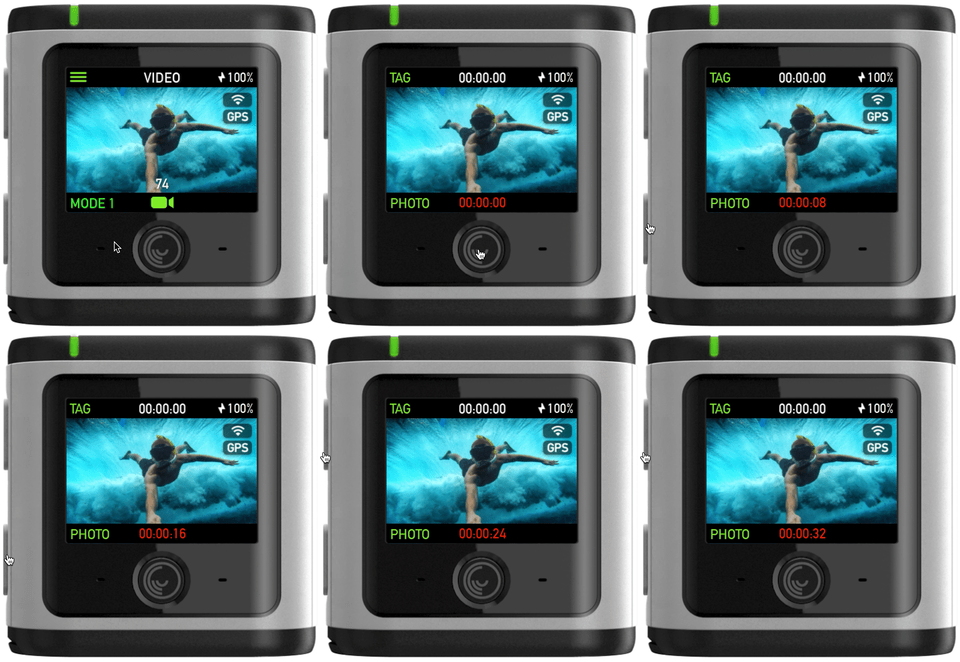
As the camera LCD is a lot smaller than the mobile phone, one can't fit all the same information, so every time you push the mode button, a quick HUD comes up to summarise what mode you are now in.
A lot of inaction shots require your camera to be mounted on your helmet or your chest or some other peripheral, other than right in front of you. It's difficult to navigate the camera controls while in action to see which setting you're in or see how to change it. I prototyped what the camera would do besides the screen changes, such as the camera LED light flickered and small beep sound depending on which mode you are in. This helped reinforce the 1,2,3,4 mode theme.
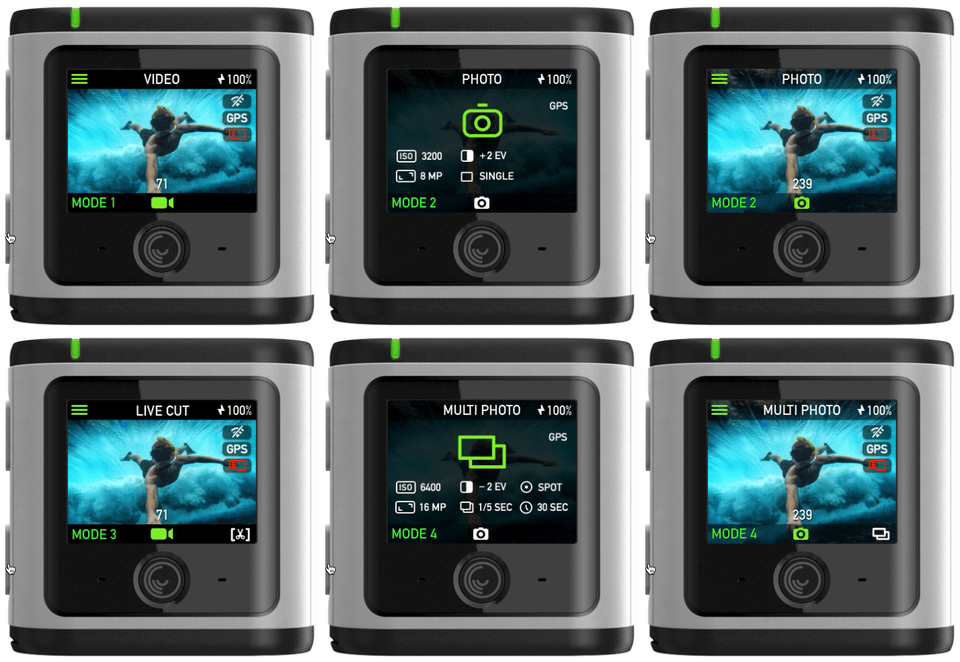
We used the bottom button as a mechanism to scroll through the camera modes. The screen changed as well as indicated the associated beep and led light flicker.
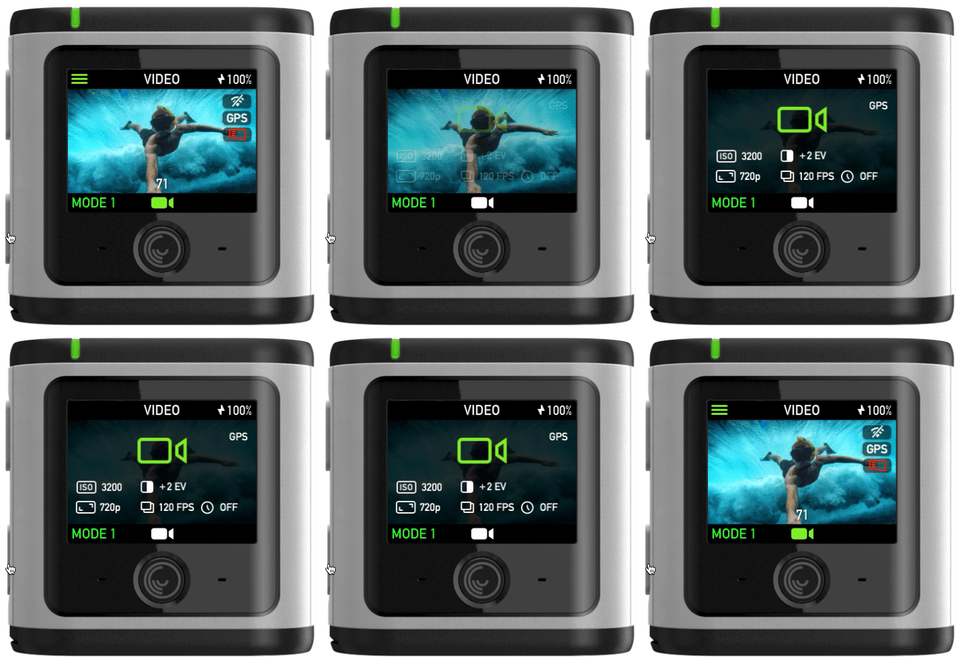
A user could check what mode they are in by pressing and holding the button in. The screen changed as well as indicated the associated beep and led light flicker.
Recording
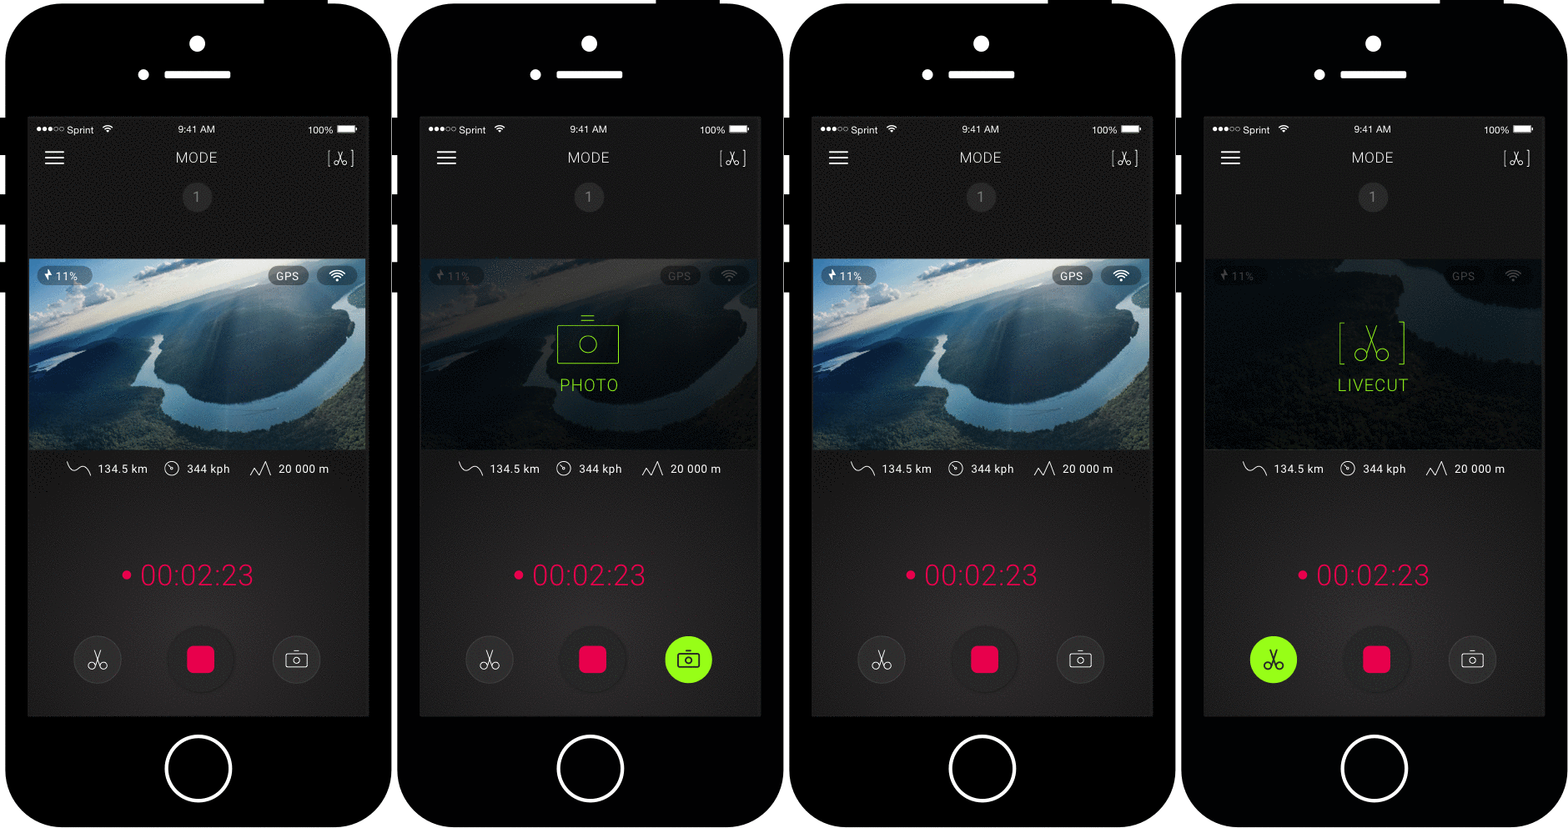
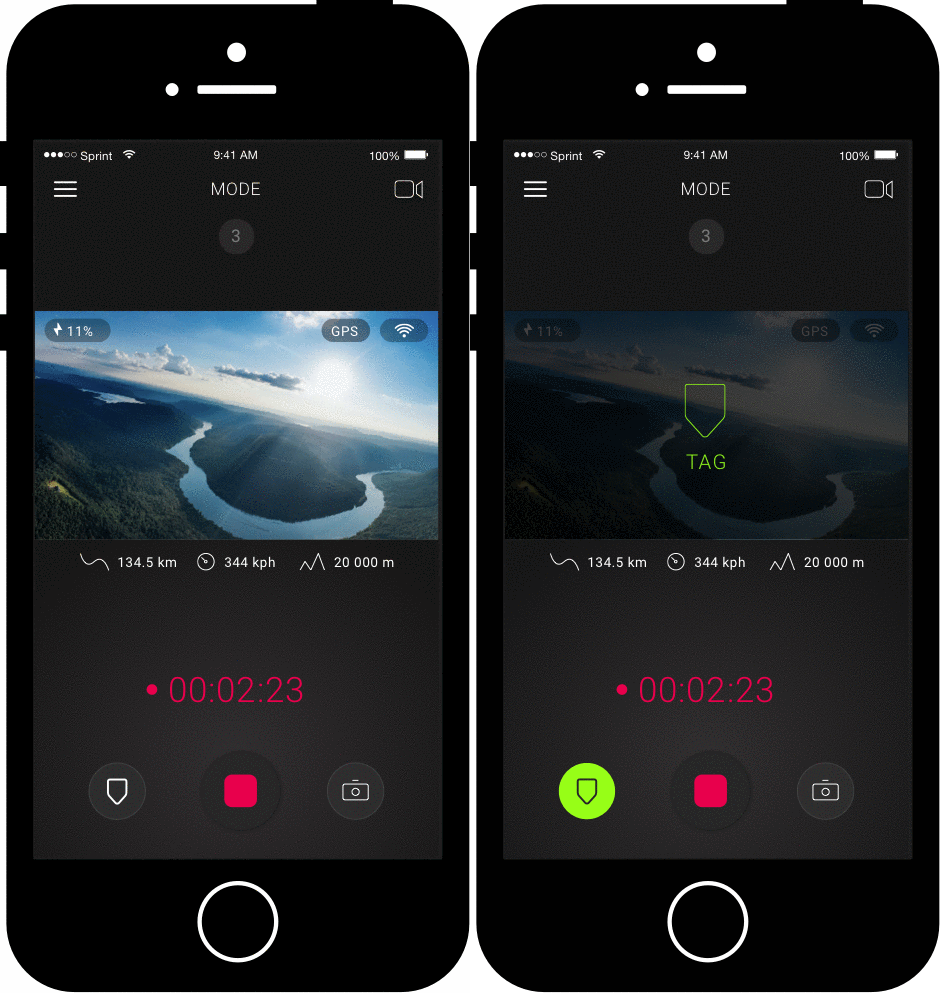
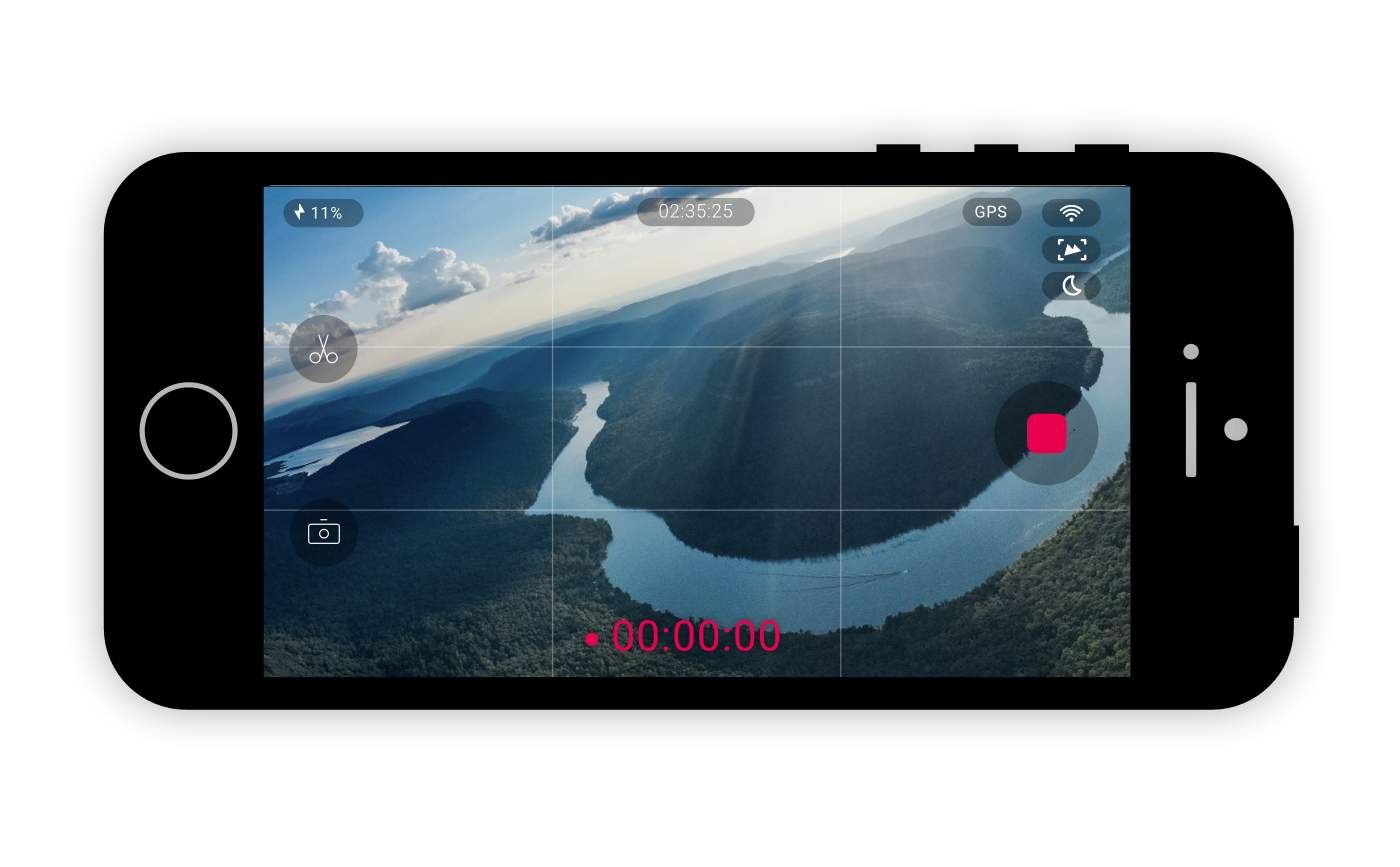
During recording, a few instances can occur. I needed to design for when a user wants to tag their shots for later on or take a photo during filming. I added new buttons while recording to cater for these quick actions.
We came up with the idea of tagging footage and then it would instantly re-looping the footage so if you had a couple of bad takes you could just tap the button, it would ditch your footage from the last time you started recording and start recording afresh again. This came in handy when users keep making mistakes and only want to capture the successful take. We settled on the term LiveCut® and added it as a shooting style the user could designate a mode to.
During recording, a few instances can occur. I needed to design for when a user wants to tag their shots for later on or take a photo during filming. I added new buttons while recording to cater for these quick actions.
Transferring this to the camera meant that the two available physical buttons were now utilised for photo and tag or LiveCut® during recording.
Handling errors and statuses
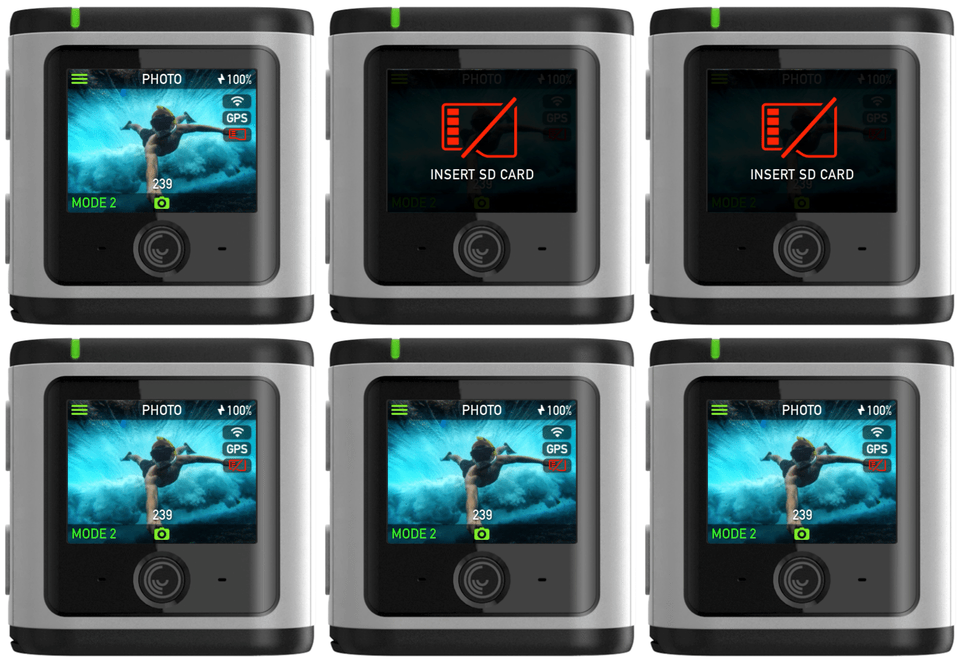
To communicate to the user the status of the camera battery, the disk space capacity and connection status, I designed some icons that could alert the user through a small prompt popup. These warning also appear as status a part of the general user interface within the viewport of the video feed.
Playback
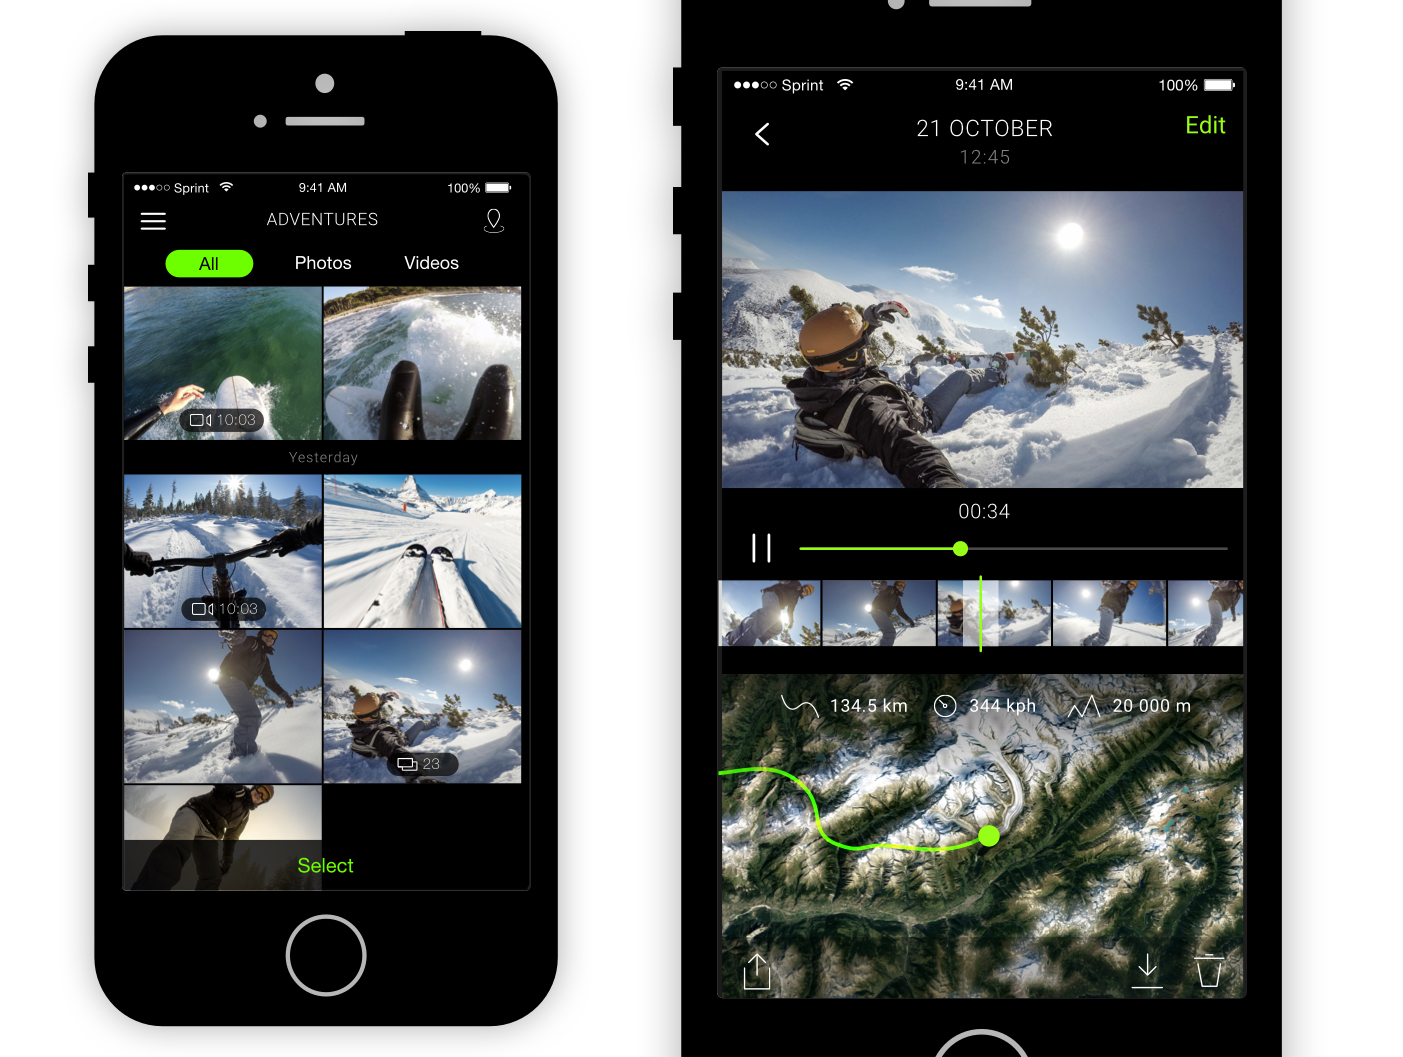
Users need a way to view their photos and videos once they had finished filming. I called it "Adventures" to be different. This adventure gallery consisted of videos, sets of photos and single photos as well. As the camera captures the GPS data while filming, I utilised the rather blank space under the video footage to indicate to the user where the footage took place at the time to gain context of the surroundings.
As the facilities and processing power of the camera was limited, I just enabled some basic playback functionality to allow the user to review their footage and remove some takes.
Enabling users to edit their movies
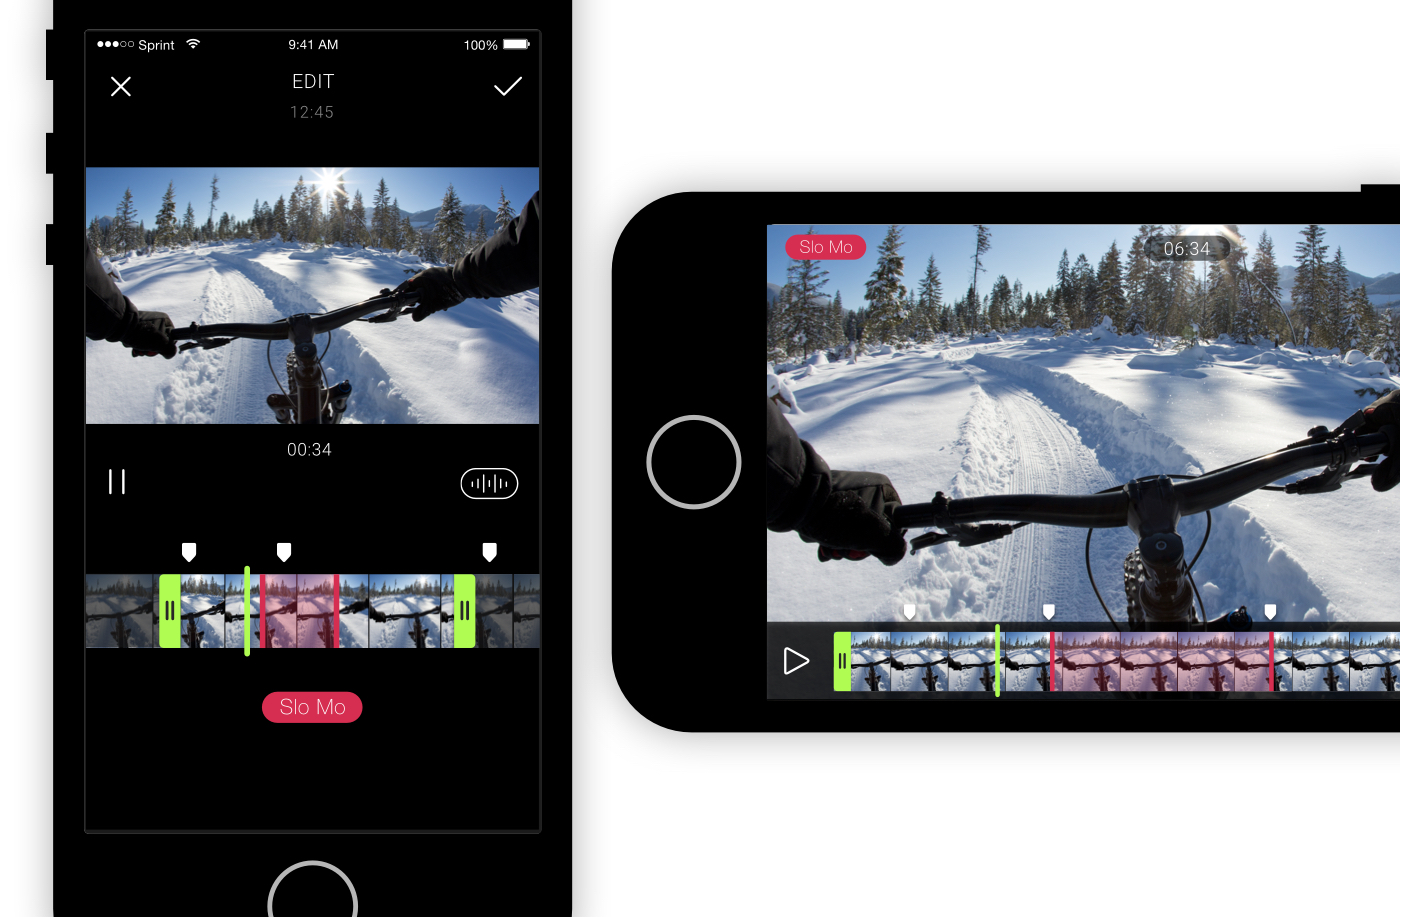
Once users download the actual video footage onto their phones, I visualised how one would edit it without becoming an overly complex editing app. I basically used an Apple-style video editing view and allowed users to create slow-motion moments within the video clip. It is sometimes easier to edit in the landscape, so I designed a landscape view as well.
Finally, shipped to the world
This was such a great project to work on and wished I could have continued. I produced the assets and specs that engineers needed. Due to the nature of a contract, I couldn't see the project further until shipment. After a few months, we had won Gold in the European Product Design Award for 2016. We were also awarded 3 patents for introducing action cam video recording methods while shooting. It has now finally been shipped and receiving great feedback online. Below are some of the outcomes of the project.
The outcome
Won Gold European Product Design Award 2016
Co-designed a feature called LiveCut® that makes editing easier for users
Awarded 3 patents for recording methods while filming
Accomplished creating an eco-system across the camera and mobile app
Created visual design language including iconography and animations
Won Gold European Product Design Award 2016
Awarded 3 patents for recording methods while filming
Accomplished creating an eco-system across the camera and mobile app
Co-designed a feature called LiveCut® that makes editing easier for users
Created visual design language including iconography and animations.
Coded fully interactive camera prototype to help the engineering and product team.
Coded interactive app prototype to help the engineering team.
Produced assets and specs ready for engineering
Selected Works

Dyson robot vacuum cleaning zonesMobile app for iOT
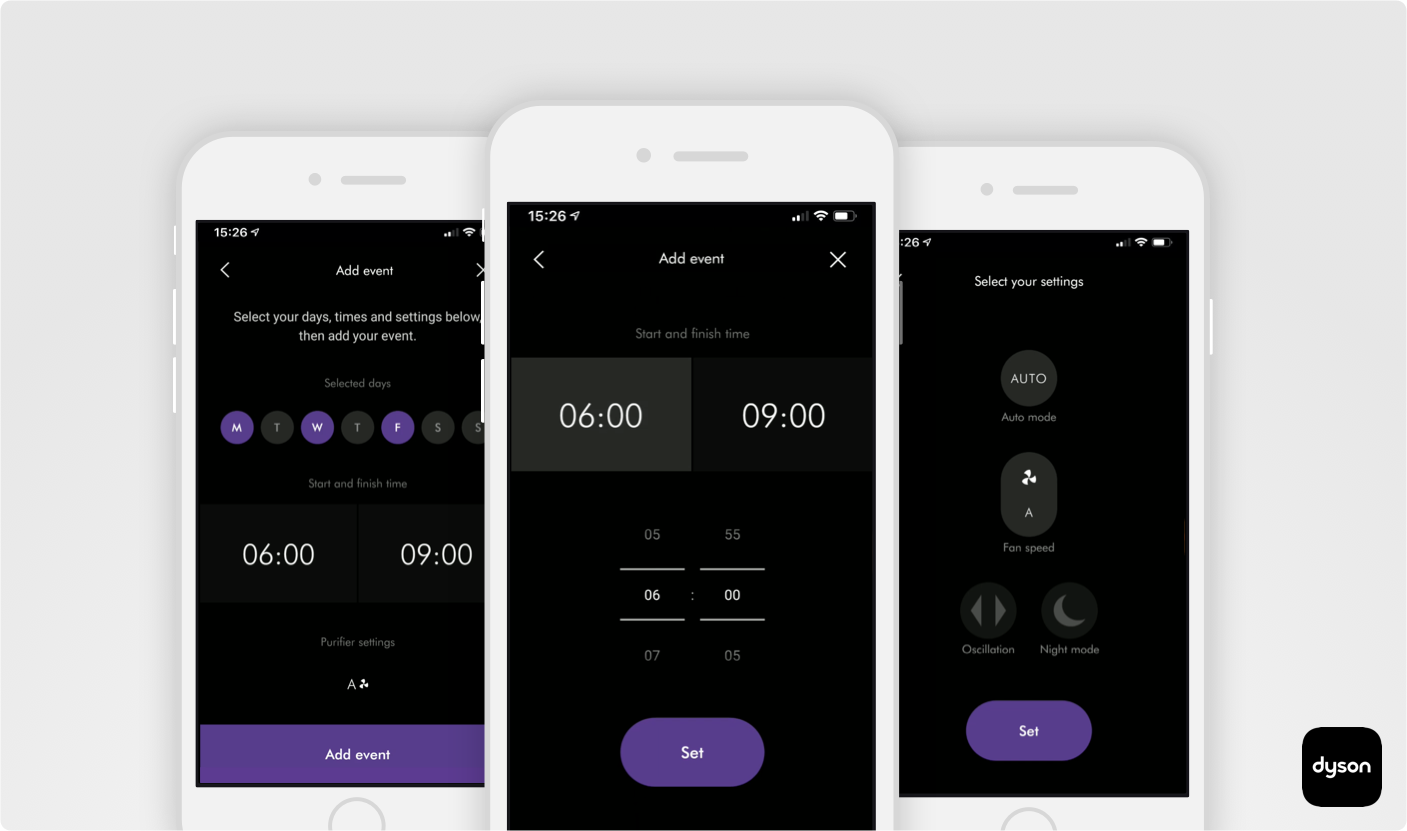
Dyson air purifier automation featureMobile app for iOT
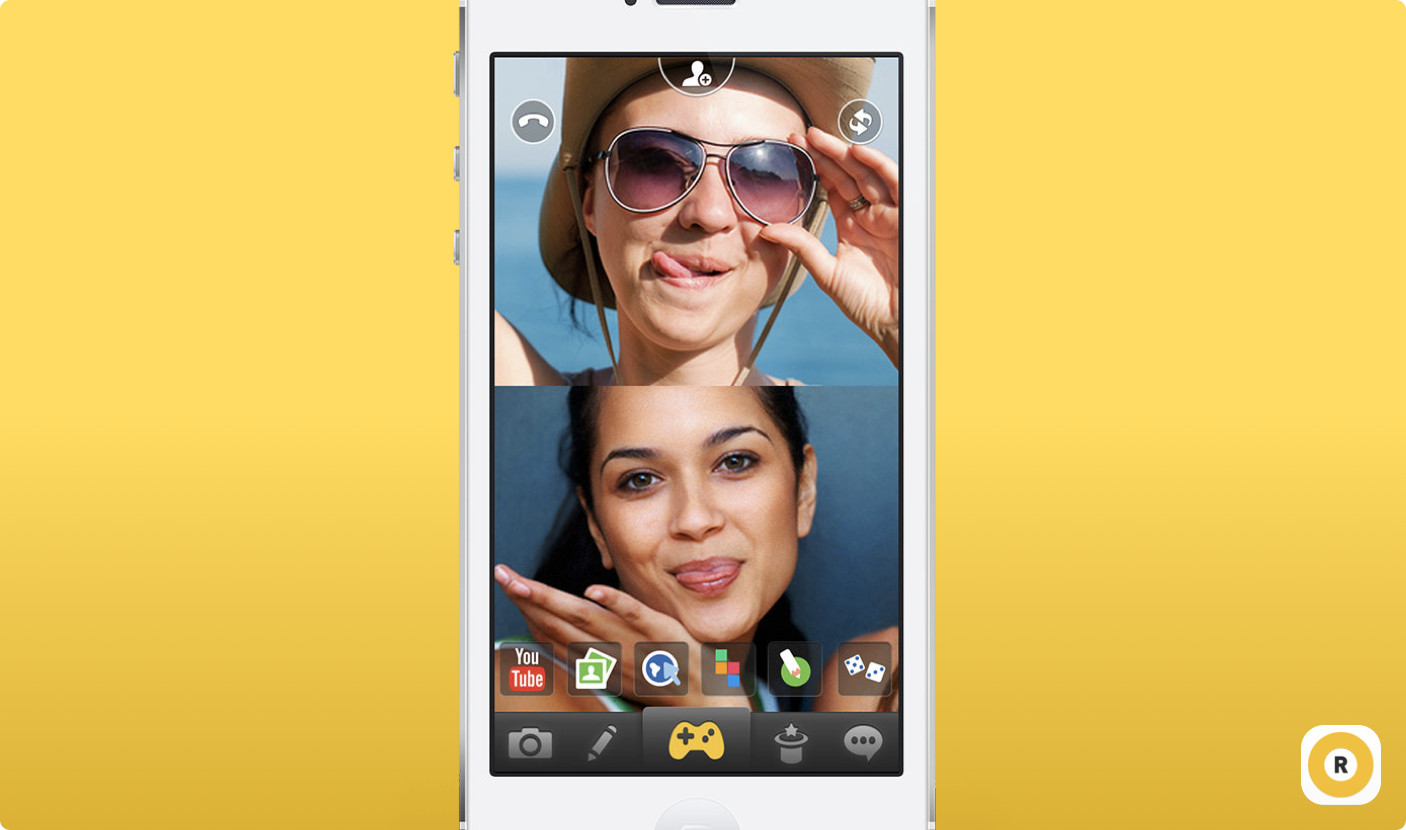
Rounds video chat hangout networkMobile app for internet communication startup
